Boxed Sets and Single Card available for the first time | HERE
Made in Sweden | Flying world wide | HERE
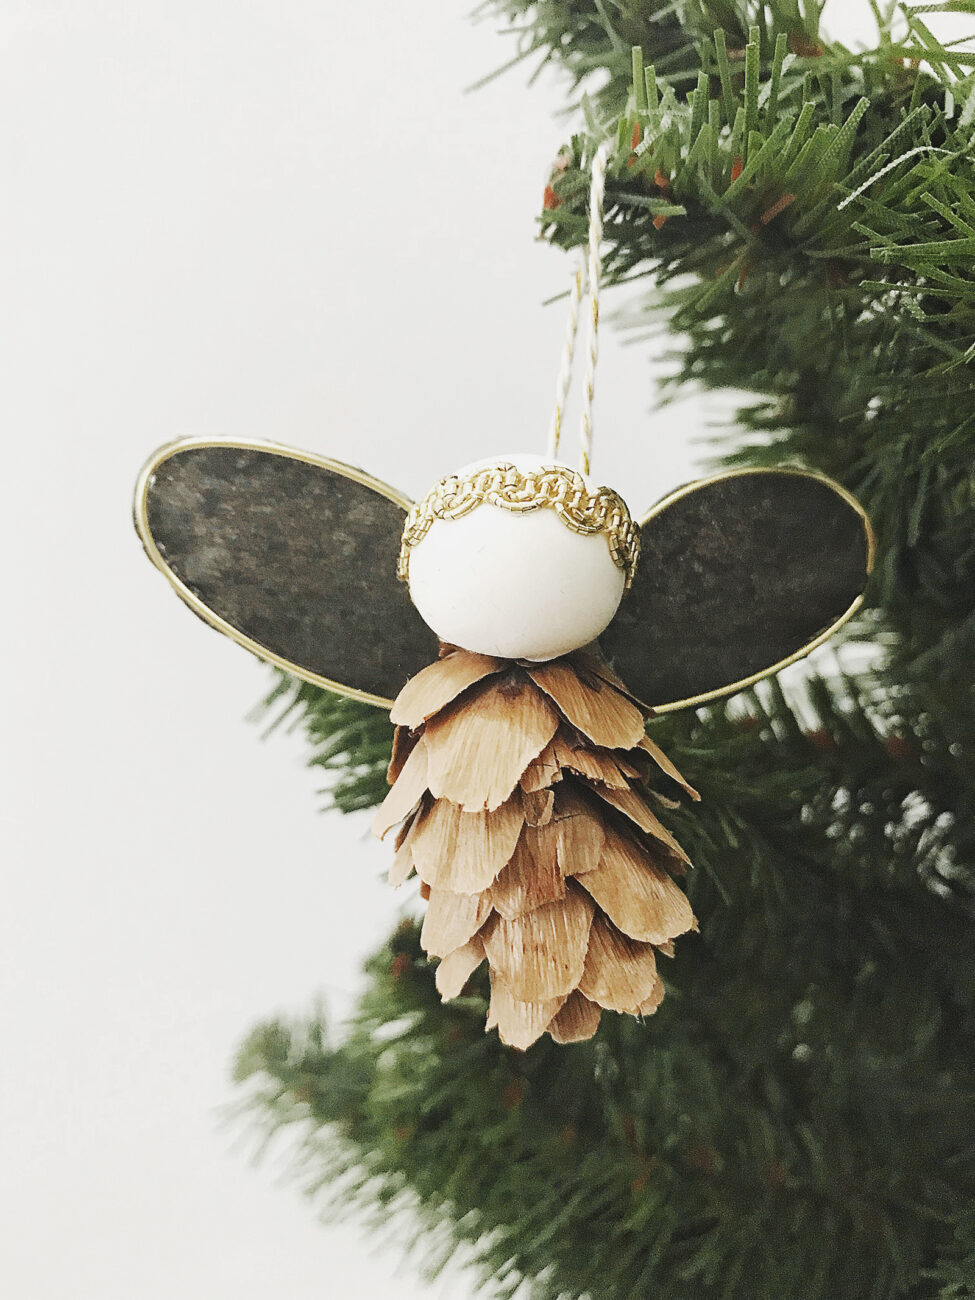
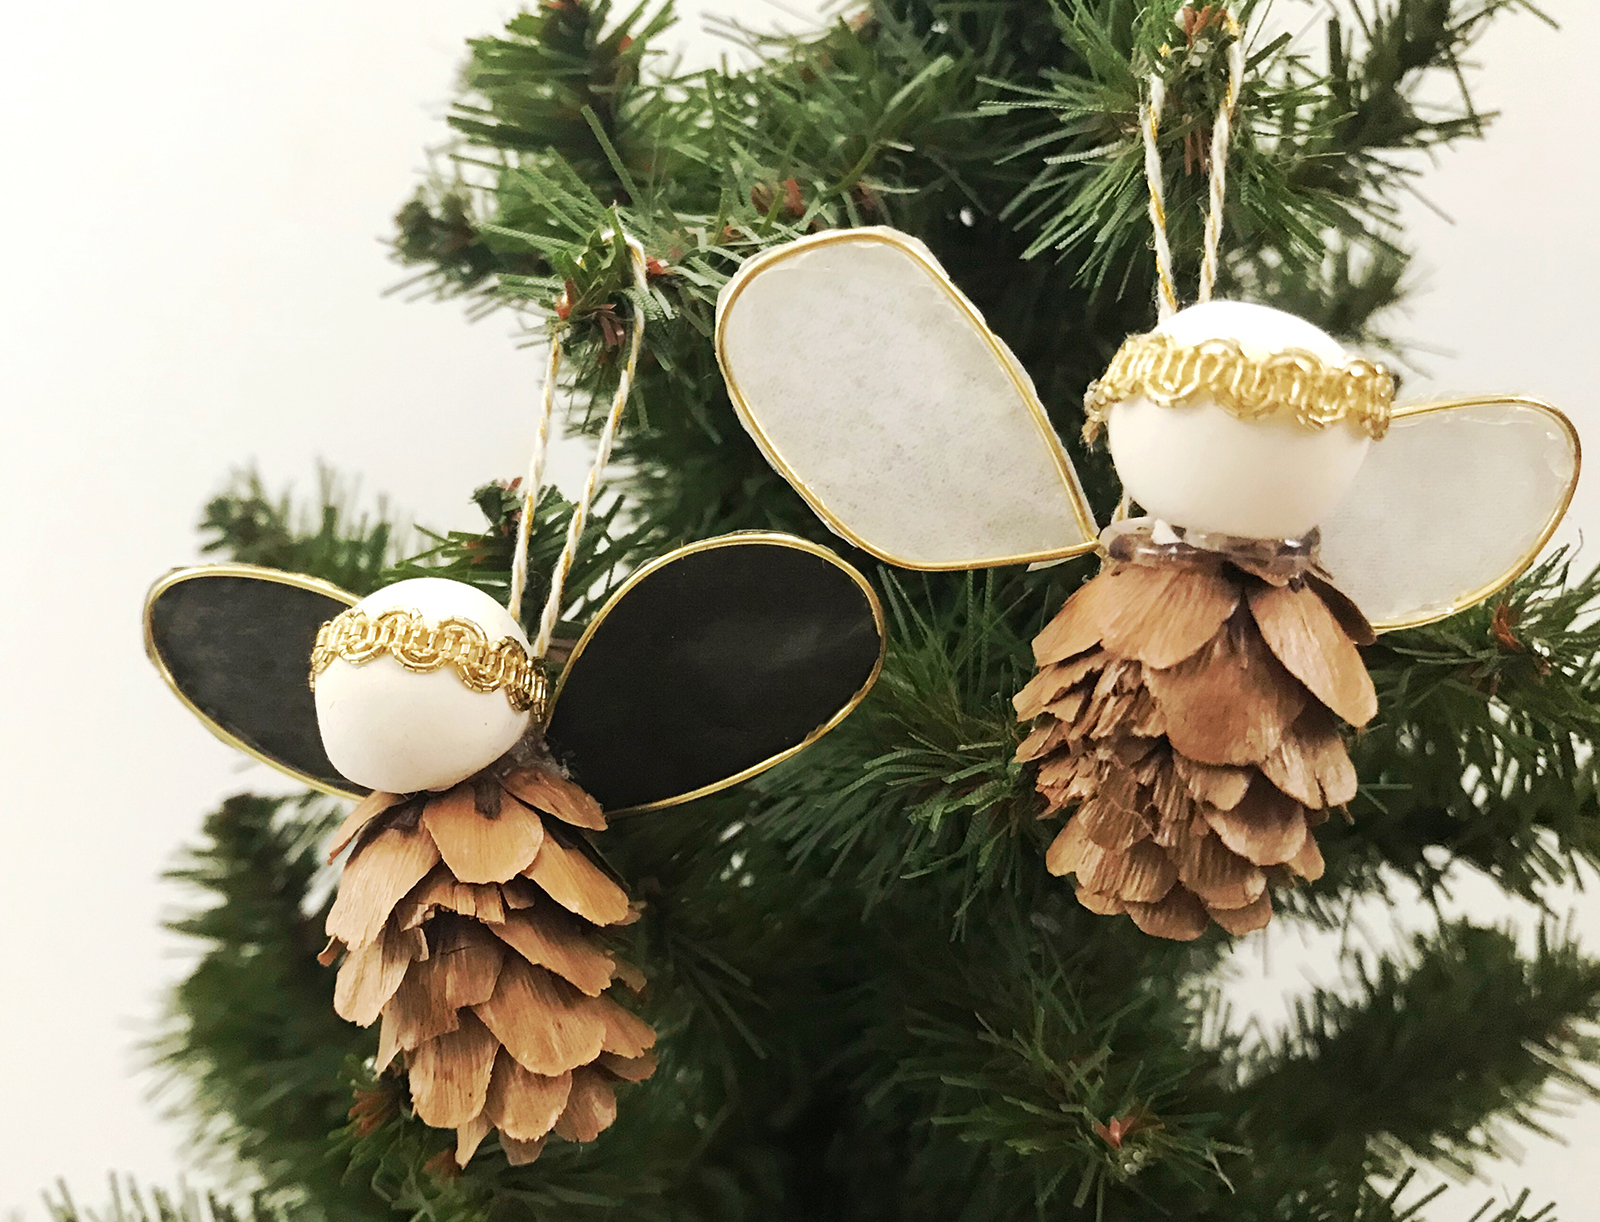
PINECONE ANGEL ORNAMENTS
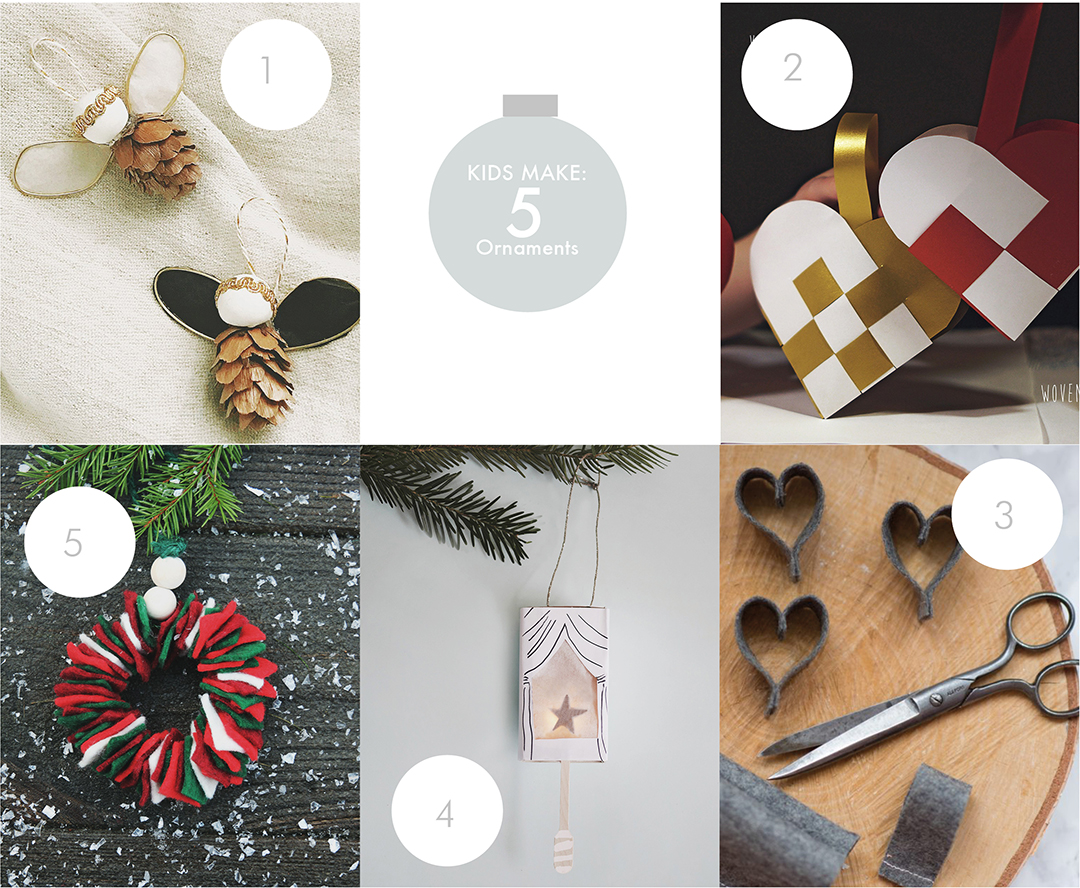
This year, as a special gift for willowday readers, I have an addition to the 24 Days of Scandinavian Christmas Creativity. I’m adding a one week KID SERIES of Scandinavian-inspired ornaments. Drum Roll, please: Starting today, you’ll find two posts per day in a five day bonus series.
Everyday this week, you’ll find :
- 5 bonus ORNAMENTS FOR KIDS
- Days 11-18 in the 24 Days of Scandinavian Christmas Calendar
Continue with me below for PINECONE ANGEL ORNAMENTS and I’ll introduce you to today’s guest:
Welcome, Arielle Goddard of Artcampla:
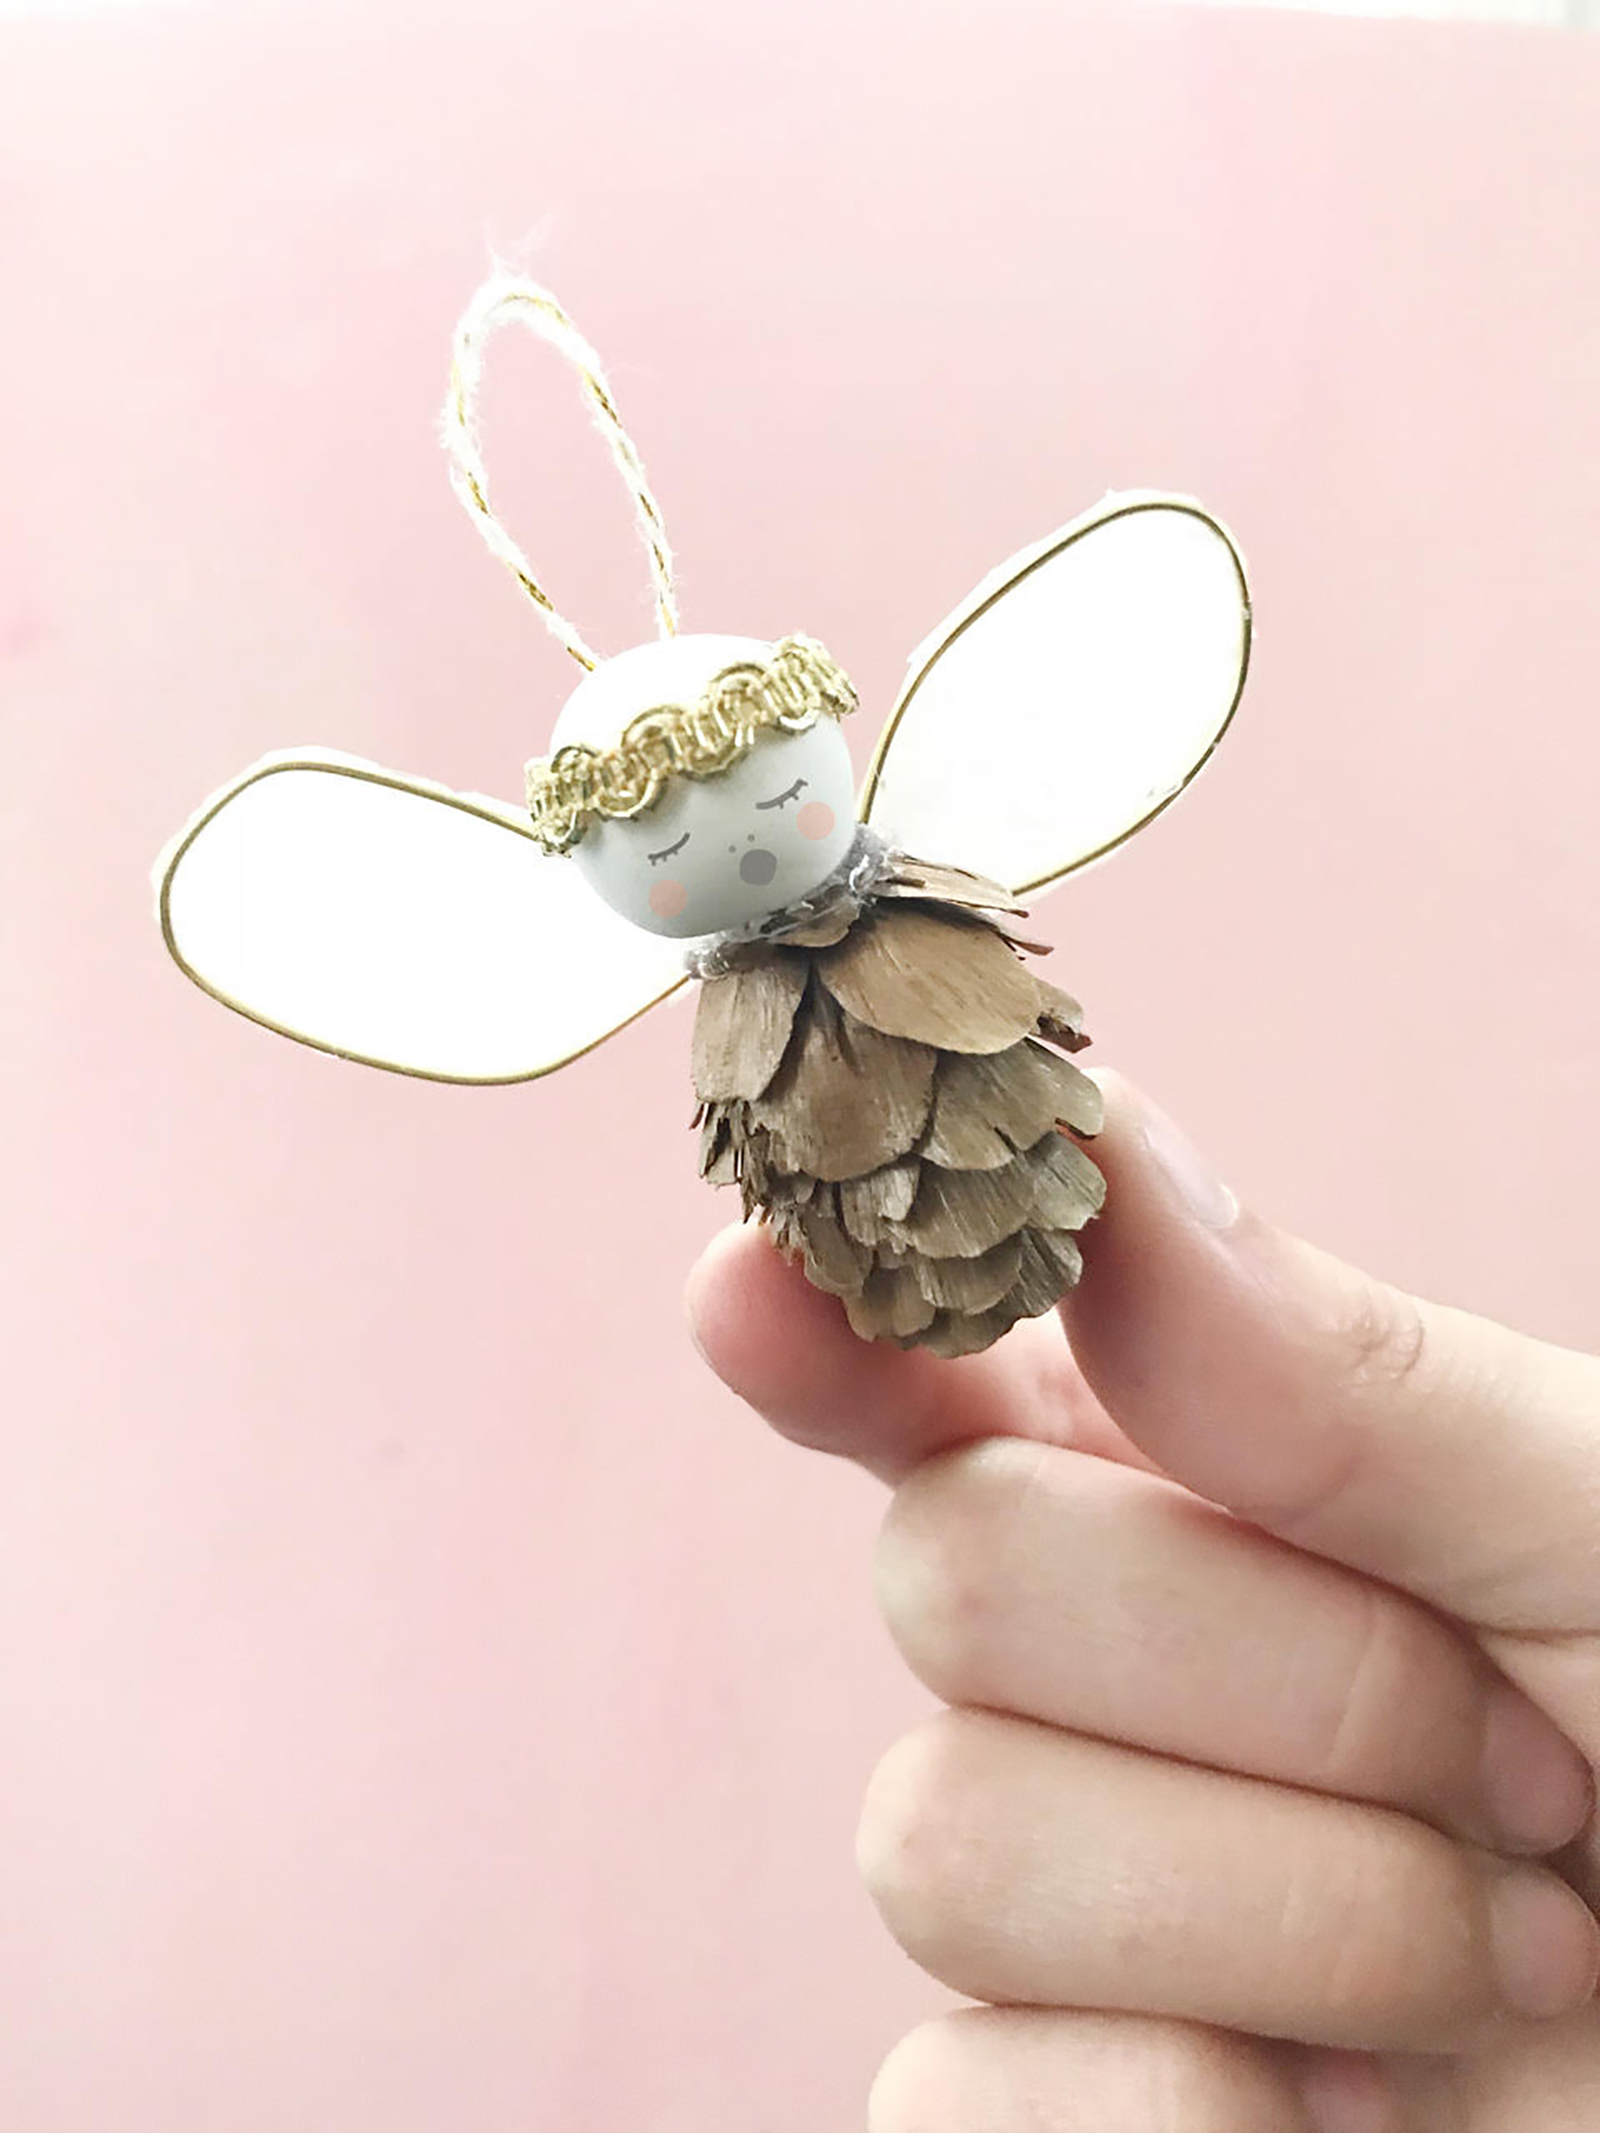
“My girls and I love to get outdoors for nice, long walks…we affectionately call these walks “treasure hunts”, sowe are always armed with a basket or two. Being avid treasure hunters means that I have drawers full of nature finds inmy studio. This collection of small pine cones has been patiently waiting, and in the last few days begging,tobe made into something for the holiday season… presenting: The Mini Pine Cone Angel!” — Arielle
Materials:
- White air dry clay (we used Model Magic)
- Small pine cones
- Thin gold wire
- Gold ric rac or ribbon for the crown
- Scissors
- Hot glue gun
- Gold and white embroidery thread
- Tissue paper
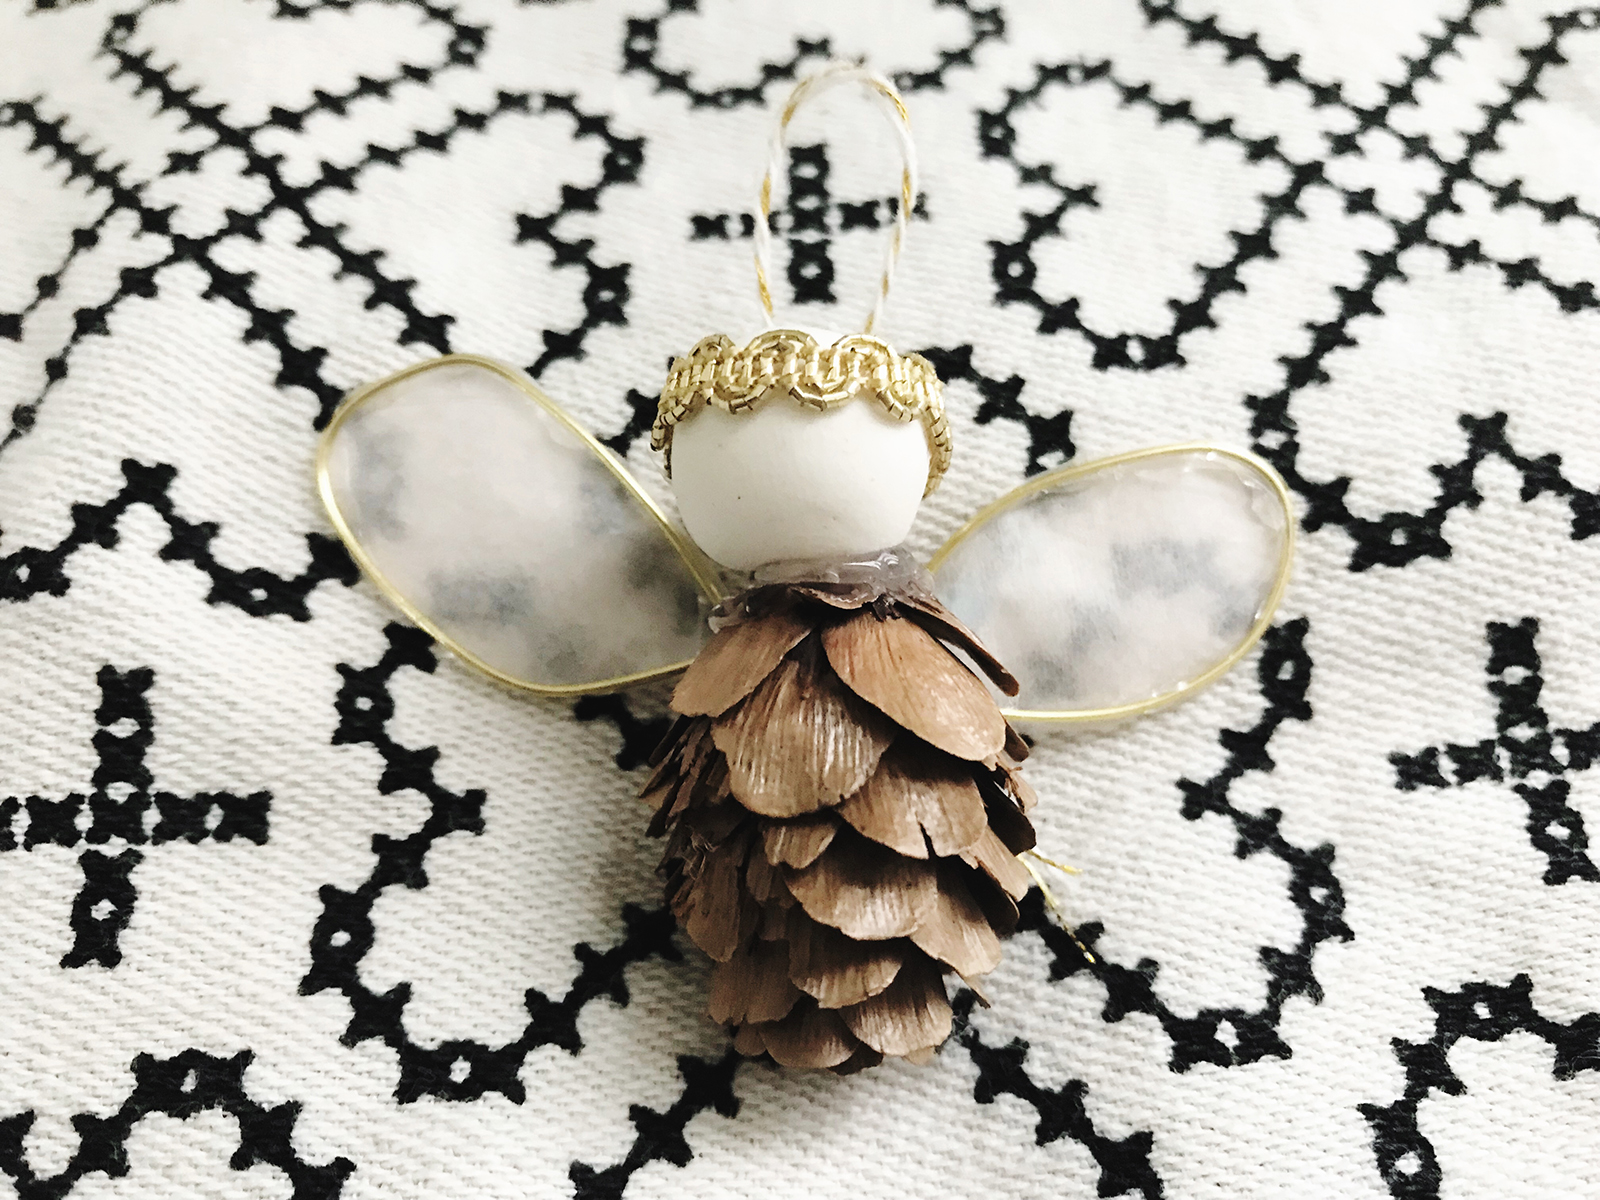
1. Take a small section of modeling clay and roll it into a ball to make your angel’s head.
2. Attach a small ball of clay to the base of your pine cone with a dab of hot glue.
3. Once your glue has set and your head feels firmly attached to your pine cone, you will add your little gold crown. We used a small section of gold ric rac.
4. Before you glue down both sides of your crown, make a hanging loop with your thin embroidery thread.
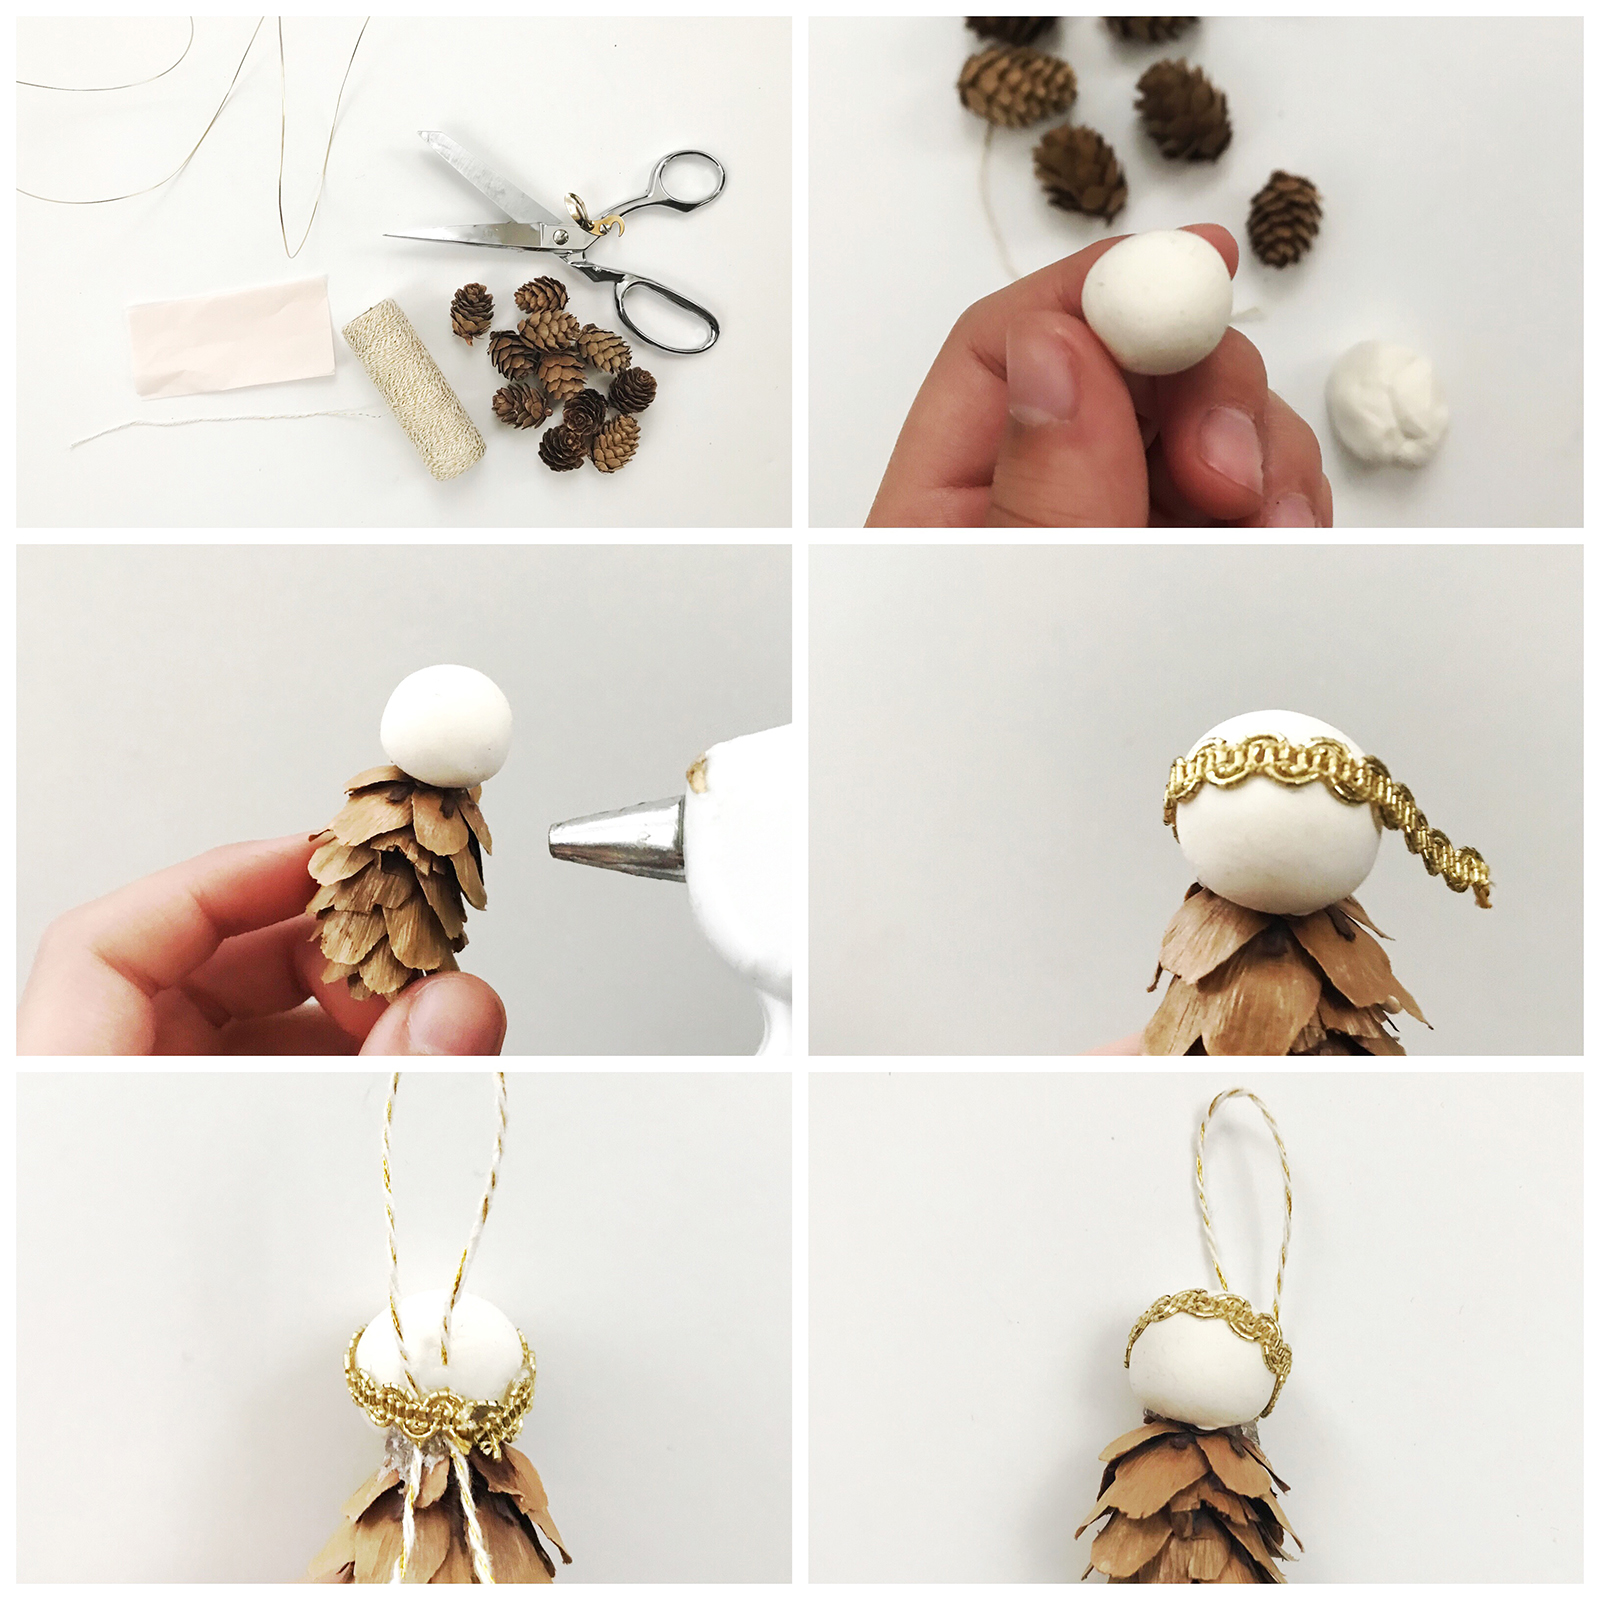 5. Once you have glued down your embroidery thread hanging loop, glue both ends of your crown.
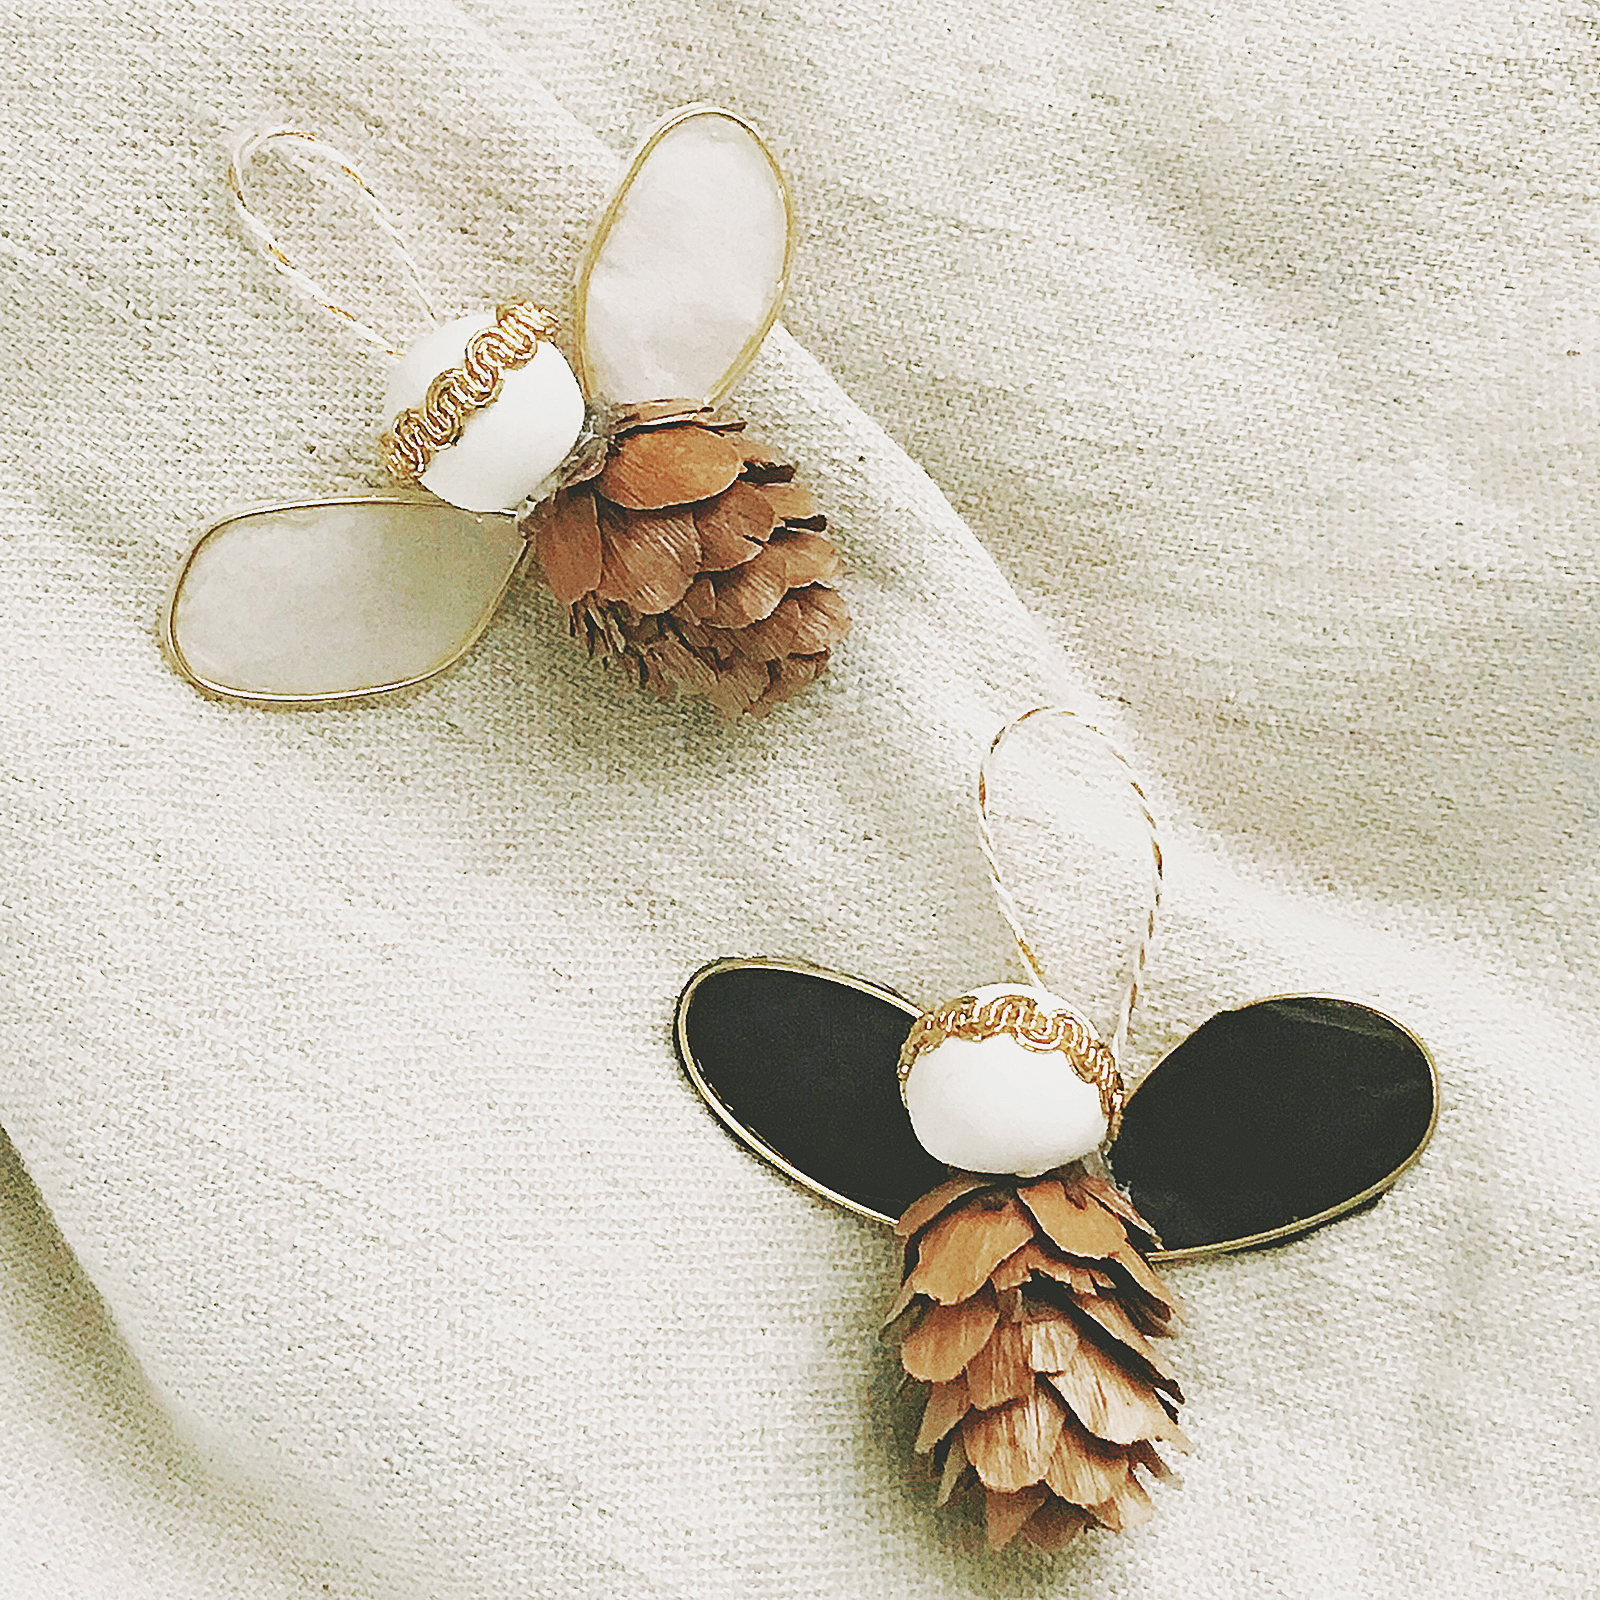
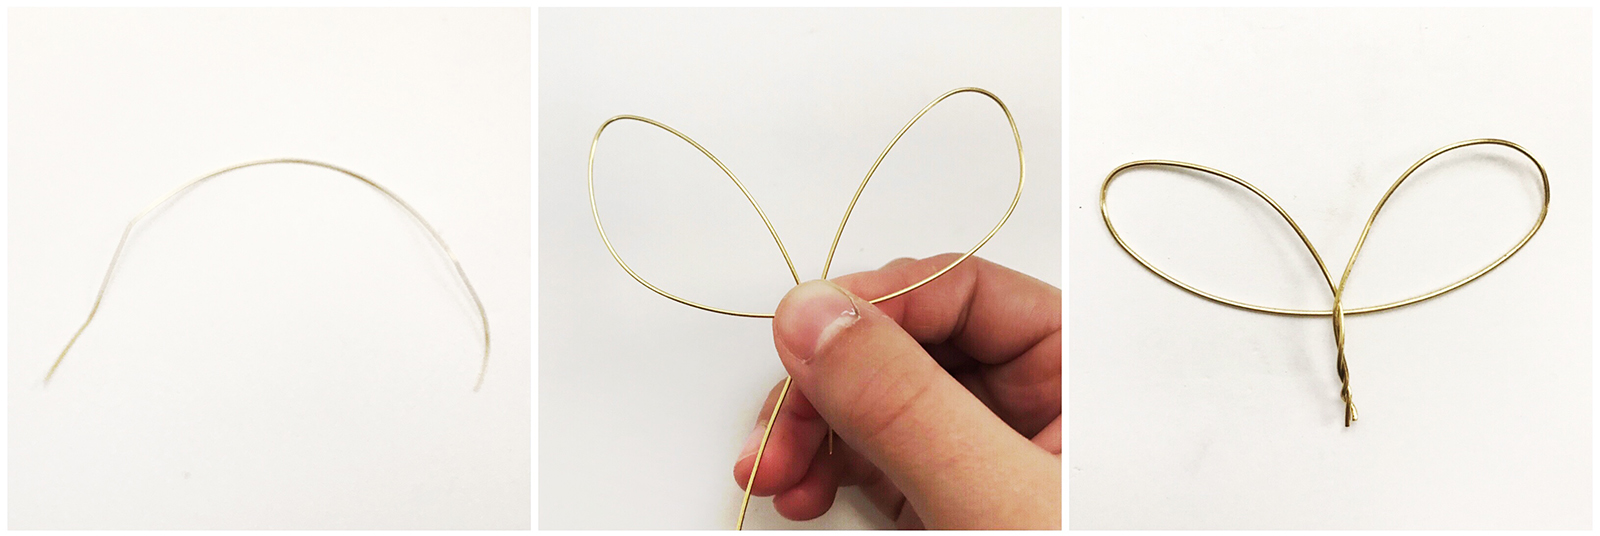
6. For the wings: cut a 3-4” piece of gold wire, bend both ends toward the center, and twist.
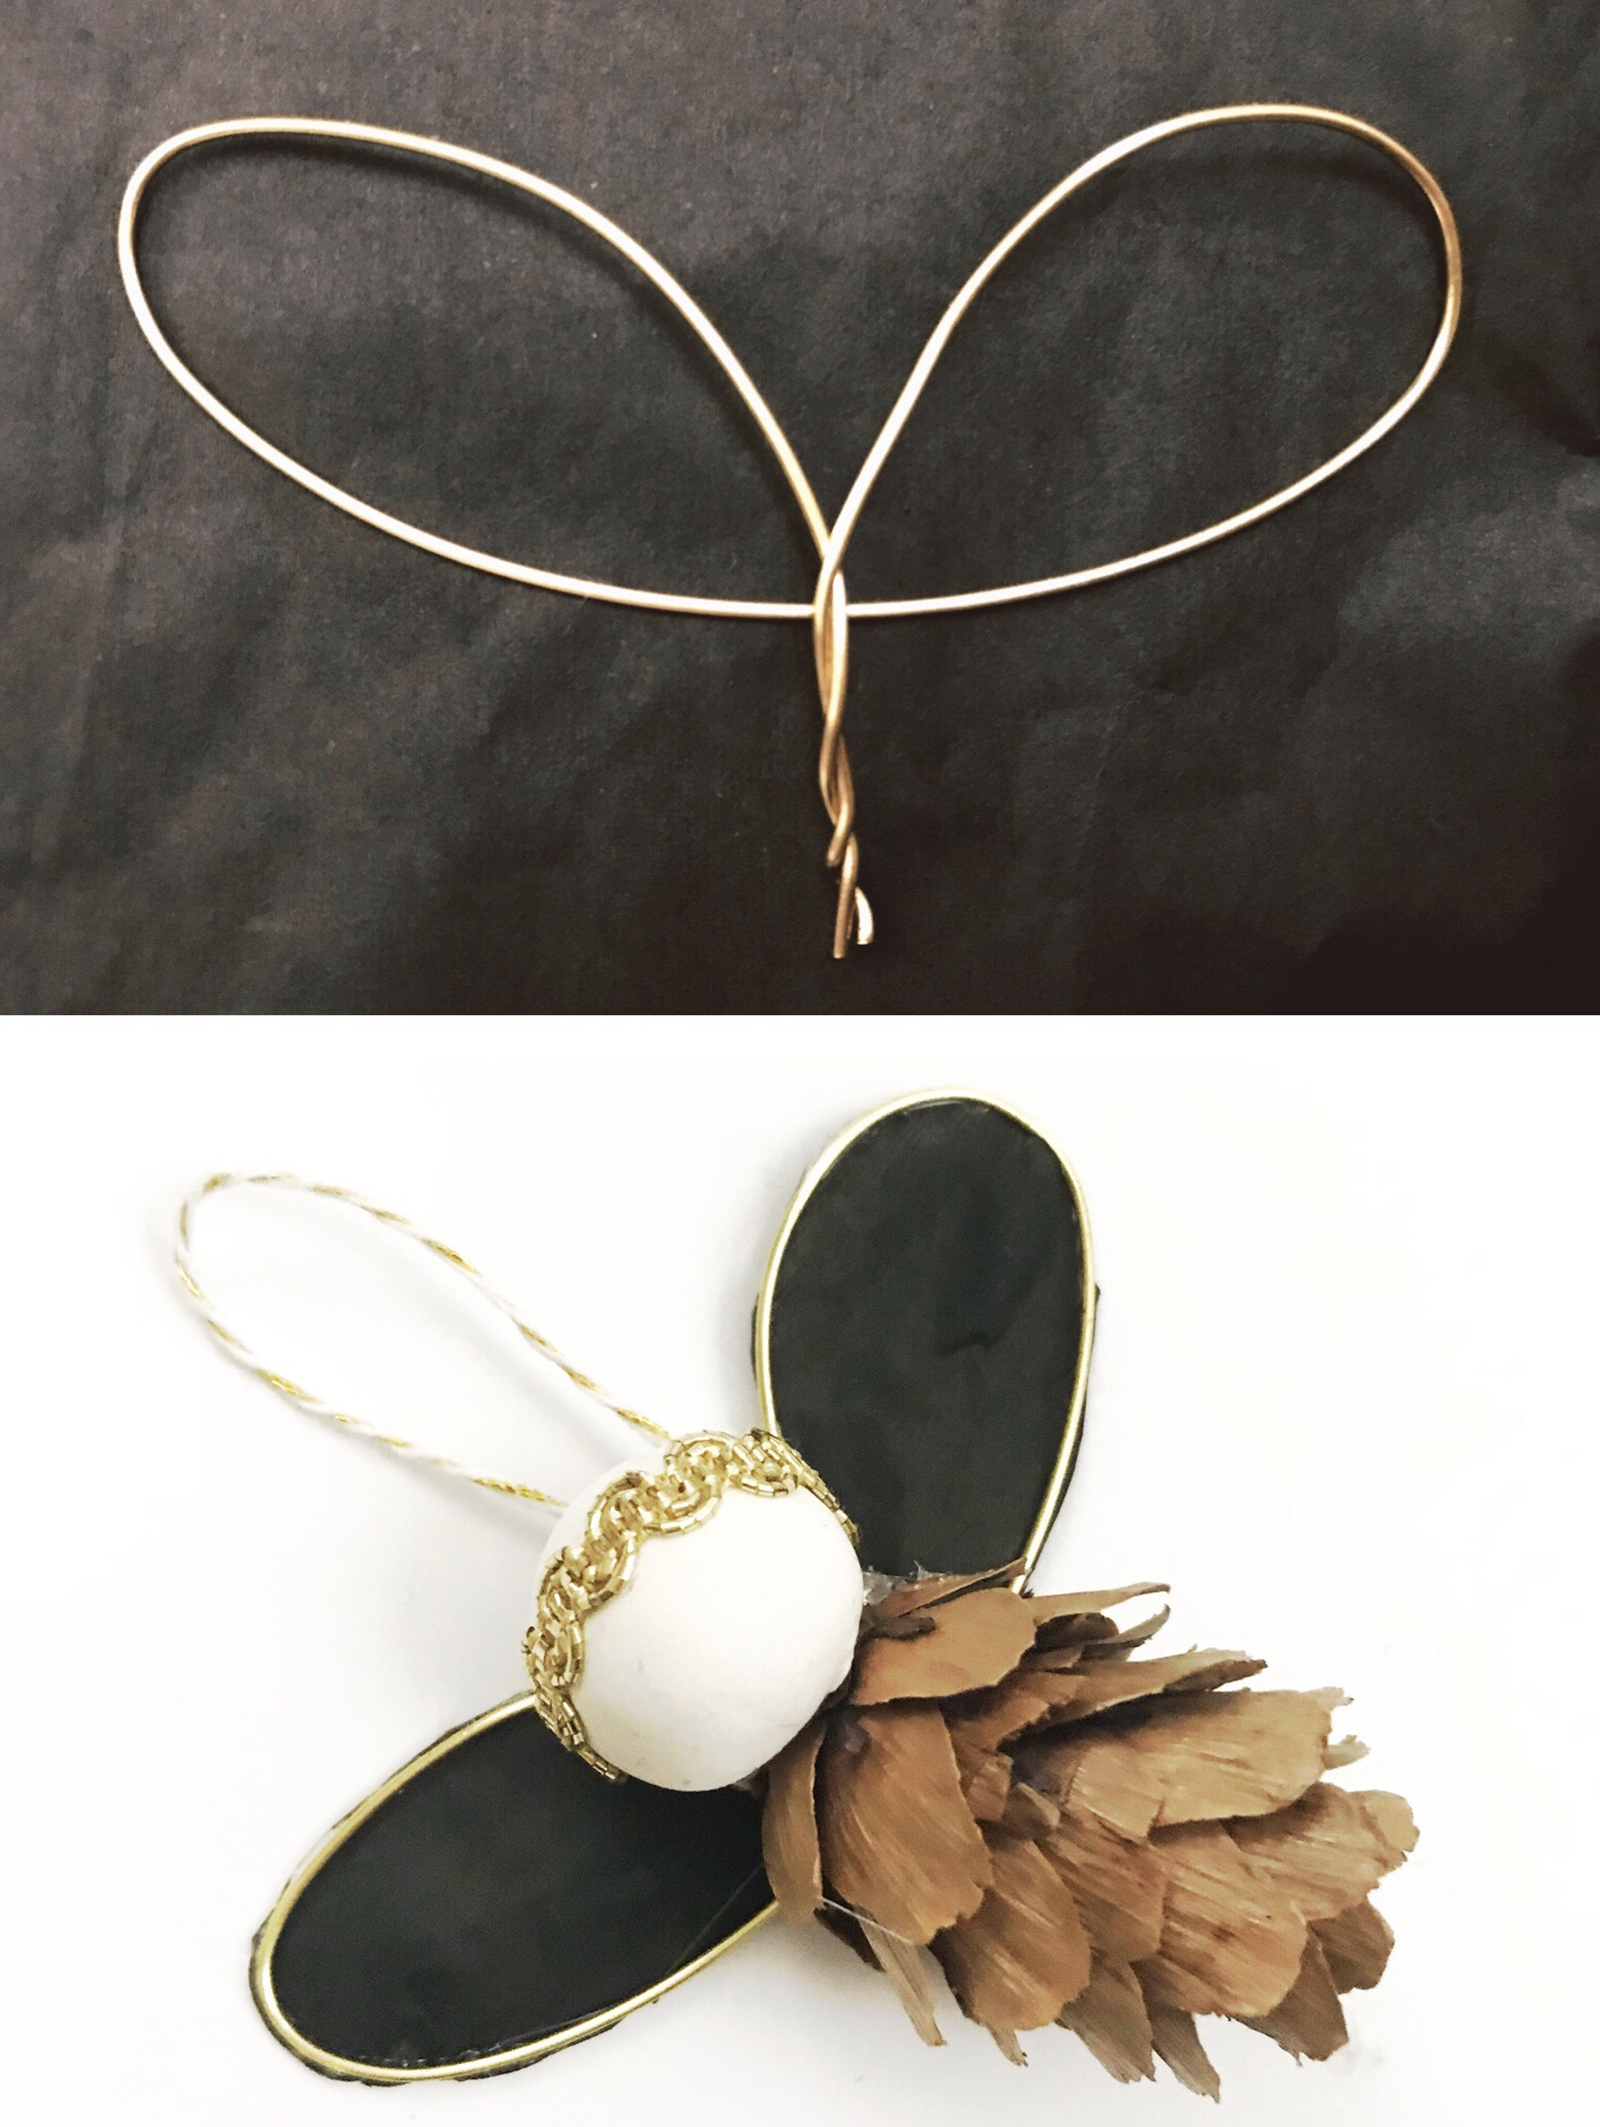
 7. You can leave your wire wings asisor you can add some delicate tissue paper to the inside of the wings, simply add tiny drops of glue to your wire and press it into your tissue paper. Trim the excess tissue paper, leaving only what you need for the center ofyour angel wing. We decided not to add facial features to our pine cone angel because we like the simplicity of a blank face, but you could certainly add eyes, a mouth, and rosy cheeks toyour angel, if you desire.

Thank you Arielle Goddard, ART CAMP, for joining me from sunny California. I “met” Arielle, last December, when she opened up an Art Camp which is an art/craft/DIY studio for kids, as she kicked off her studios with 24 Christmas posts on Instagram. You can find her full series here. Arielle included a Dala Horse and several Scandinavian -inspired ornaments in her series which was filled with such kid-fun that it stuck in my mind and I wanted to “invite” Arielle to Scandinavia for this “kids-series” now.
When Arielle suggested, Pine Cone Angel Ornaments, it was as though she had actually travelled to Sweden. Earlier, I attended a Christmas workshop at SKANSEN, with Karin of Pysselbolaget but never shared that workshop with you in full. During this cultural handicraft night, we made Swedish Christmas Ornaments from the 18th -20th Centuries using traditional techniques. We gilded walnuts with gold and made cotton/paper Angels. I love thinking of that night and pairing it with these nature -inspired modern Angels takes me back to this traditional Swedish event and also acknowledges harmony with natures that I find in Sweden. Perfect, Arielle.
SEE KIDS MAKE SERIES HERE: Find the Pine Cone Angels and all 5 in this series HERE
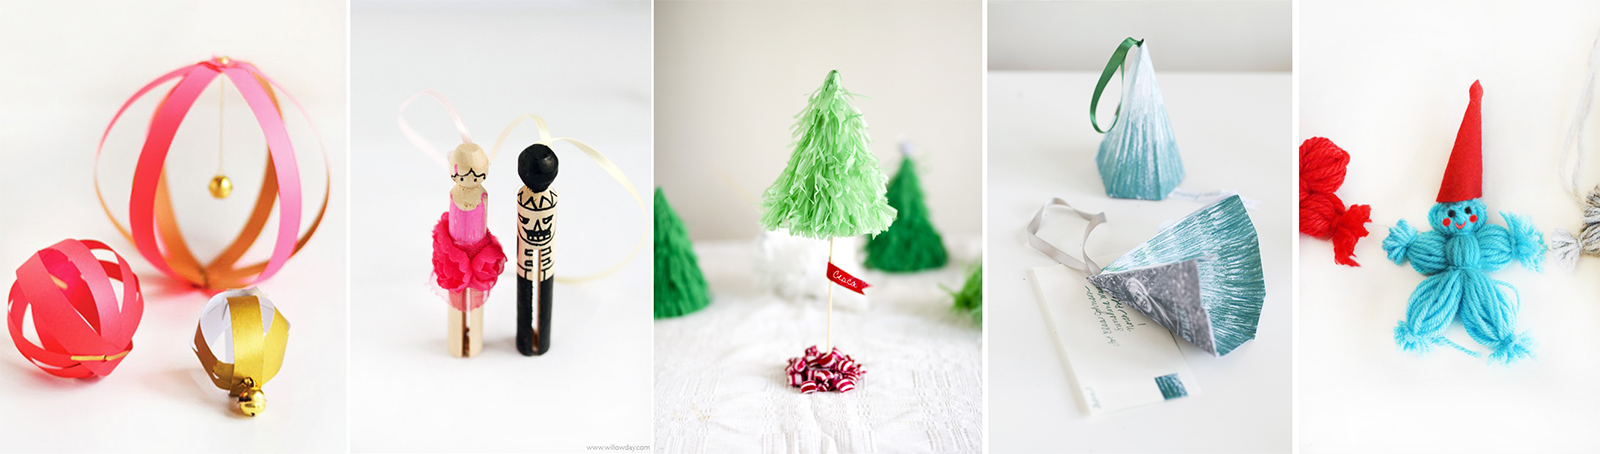
SOMETHING YOU MIGHT LIKE:
- Paper Ball Ornaments
- Clothes Pin Ornaments
- Tree Piñata Ornaments
- Christmas Card Ornaments
- Yarn Doll Ornaments
Archive with ALL 70+ Projects from YEARS 1 – 3 | 24 Days of Scandinavian Christmas Creativity

