Make Magnetic Melted Bead Frames.
Let your junior product designers built functional design! Product engineering starts in the most elemental of ways: beads + imagination.

Make Magnetic Melted Bead Frames to hold their photos or artwork. They’re pretty enough to stand on their own.
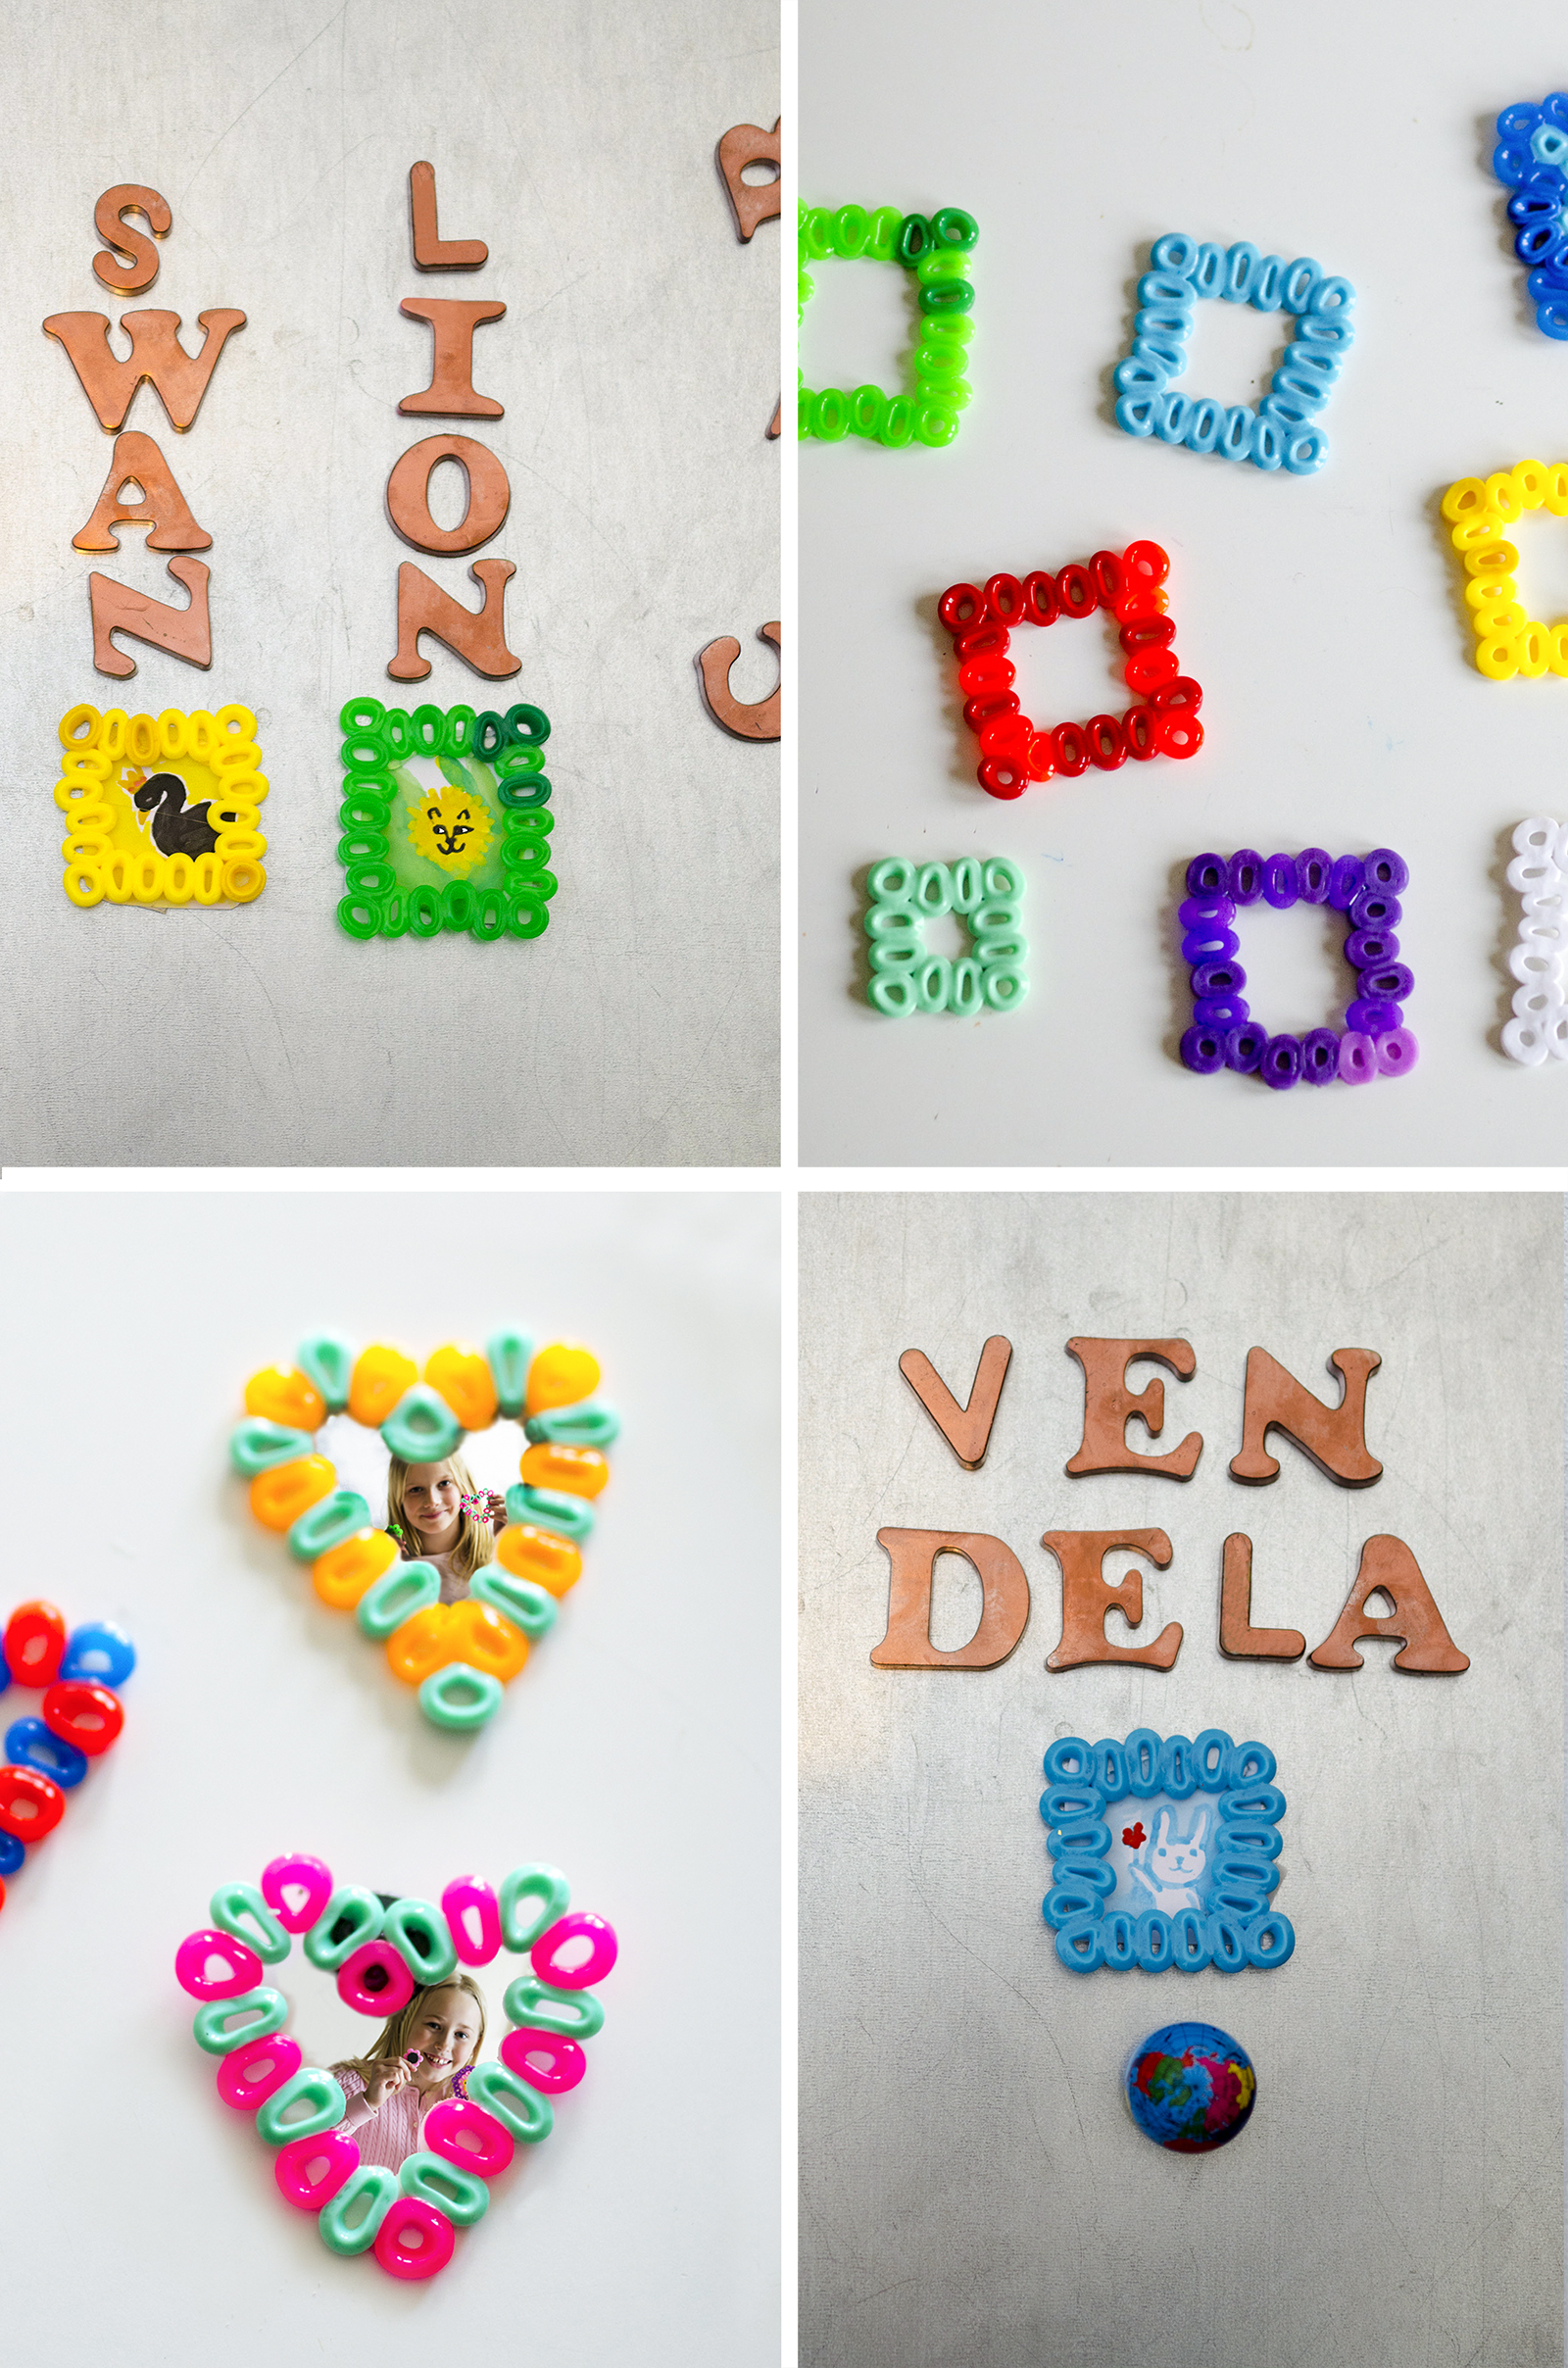
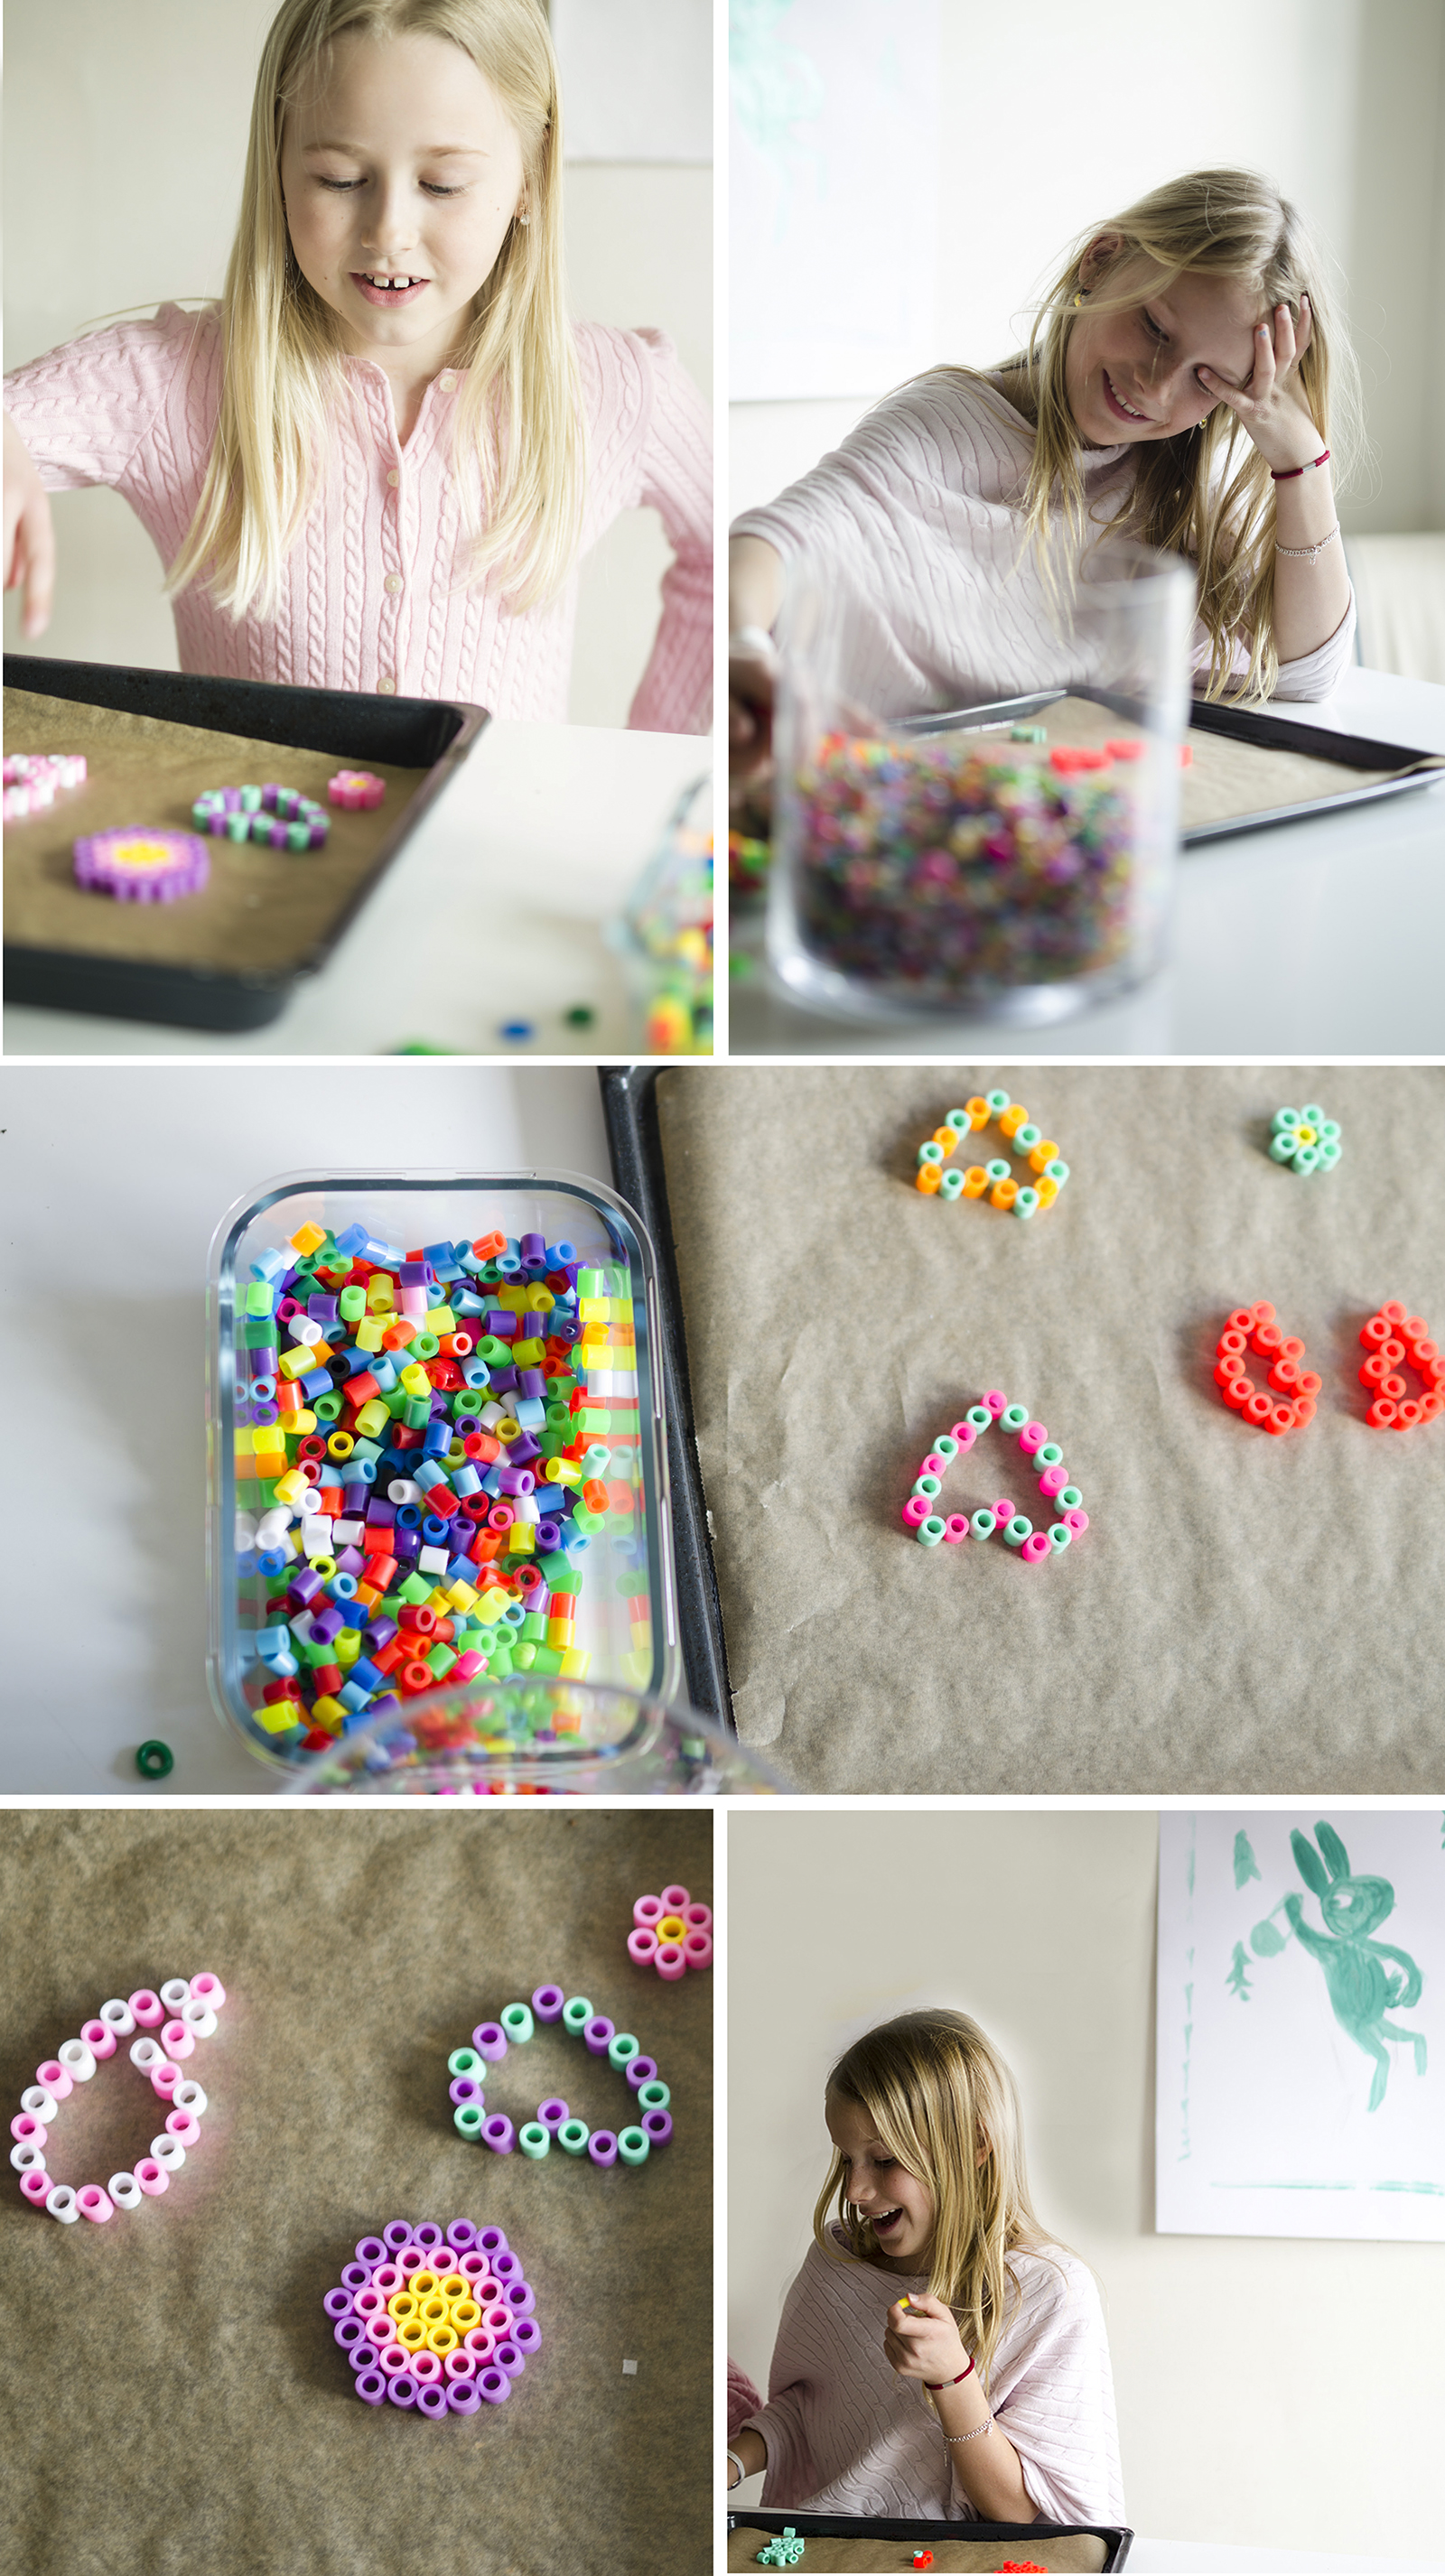
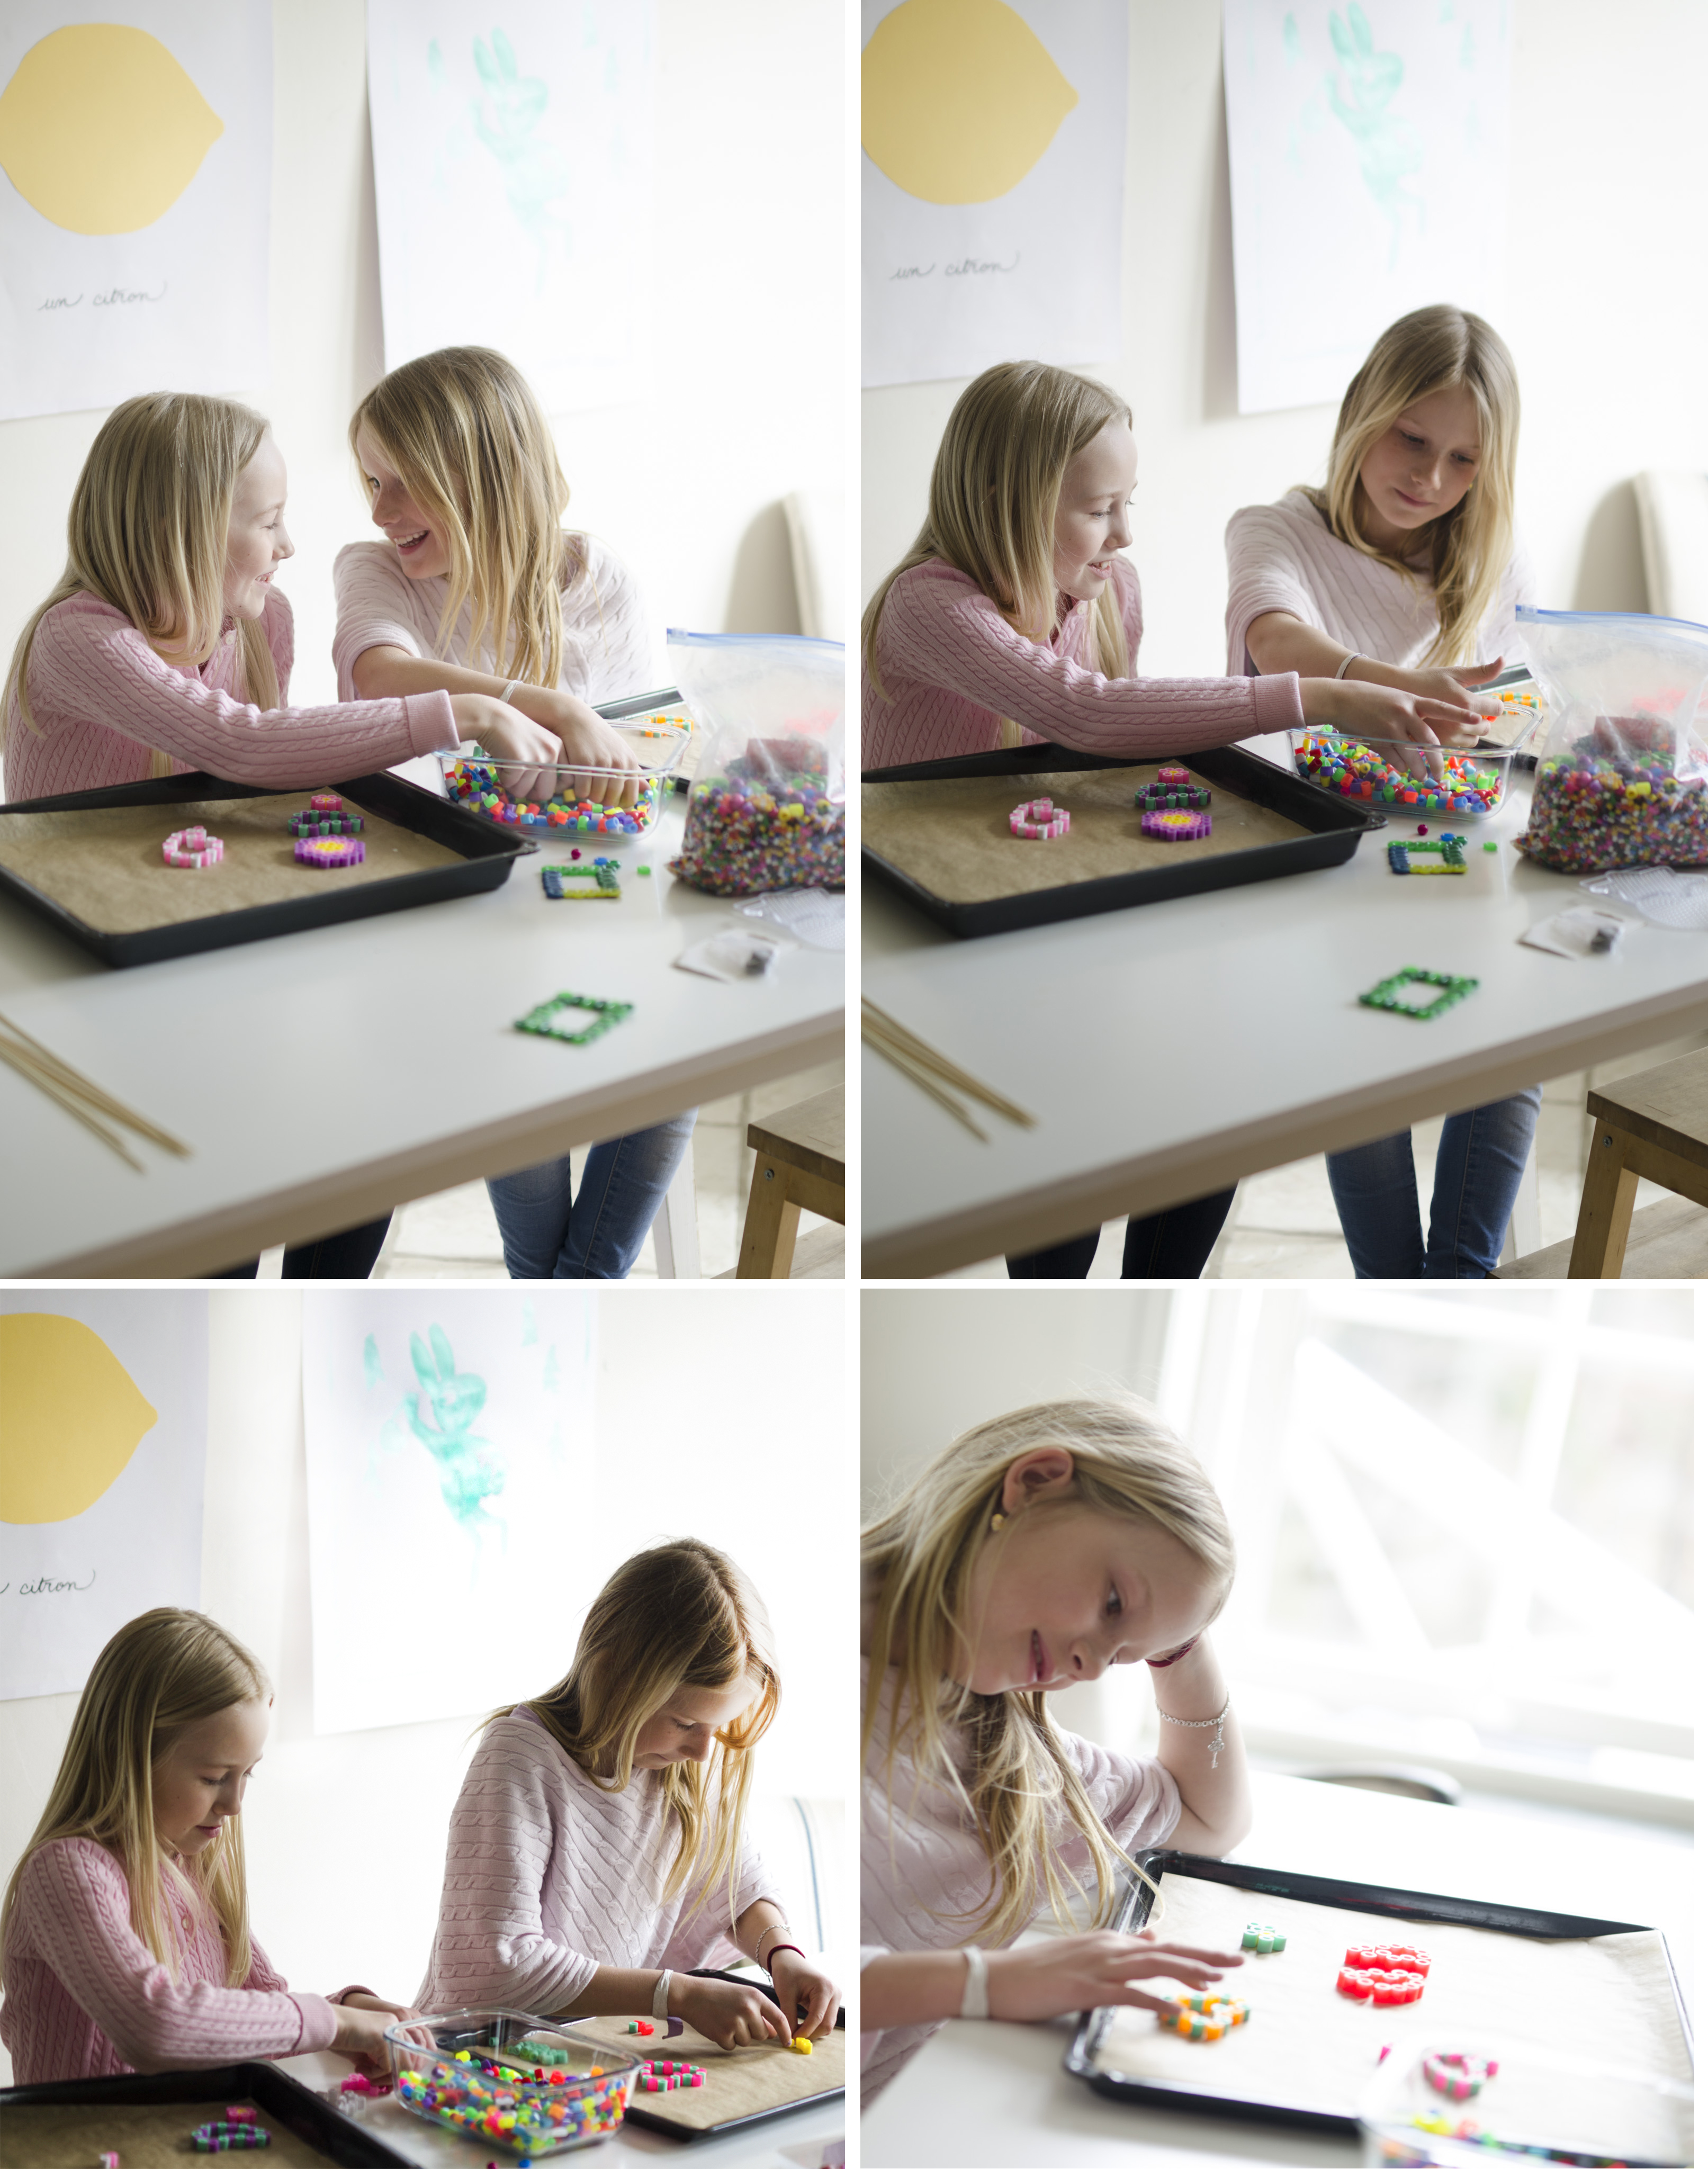
This week in my art studio, I pulled out my oversized container of unused beads and planned to start my art studio by having the girls make one Melted Bead Magnetic Frame each as a small warm-up. The kids couldn’t stop at one. They wanted to make as many Magnetic Melted Bead Frames, as I had magnets. They carefully thought out color schemes and shapes for friends, family and teachers to make Magnetic Melted Bead Frames as gifts and left my studio full of hand made gifts.
What I love about “the framework of frame making” is that it gives kids a clear way to imagine how their designs will be used. A frame gives kids a clear vision of this functionality: a pink and green heart for one friend; a blue square for a teacher.
Magnetic Melted Bead Frames create place for critical functional thinking: is the inner area large enough for a portrait; will my design hold; which magnets or how many will I need to hold up the final frame, etc. These are all great conversations, in a creative atmosphere, to impart long term thinking both of functionality, the environment; STEM learning and empathy as they consider the longer lives of these. I know that this feels like a large order for something so simple but, I dare you to set up a table and try too. I’m positive that these are the easy conversations that are intrinsically attached to this creative project in a really, loose and fun way.
Since the kids left, I love to imagine their school lockers colourfully displaying their handiwork both for themselves but of many friends and teachers. It’s a creative project that makes a super, simple, introduction to product design and one that you can refer back to when out shopping or moving through your everyday.

I confess that the reason we have so many Hama Beads is that the kids and I haven’t made many Hama bead projects. I’m very conscientious about using plastic. If I use it, I want it to have a purpose since plastic stays around for a long time. These traits also make it perfect for a project that introduces the concept of product design. If care and planning is put into making the Magnetic Melted Bead Frames, these frames will last and last and last; ready for years of photos and drawing.
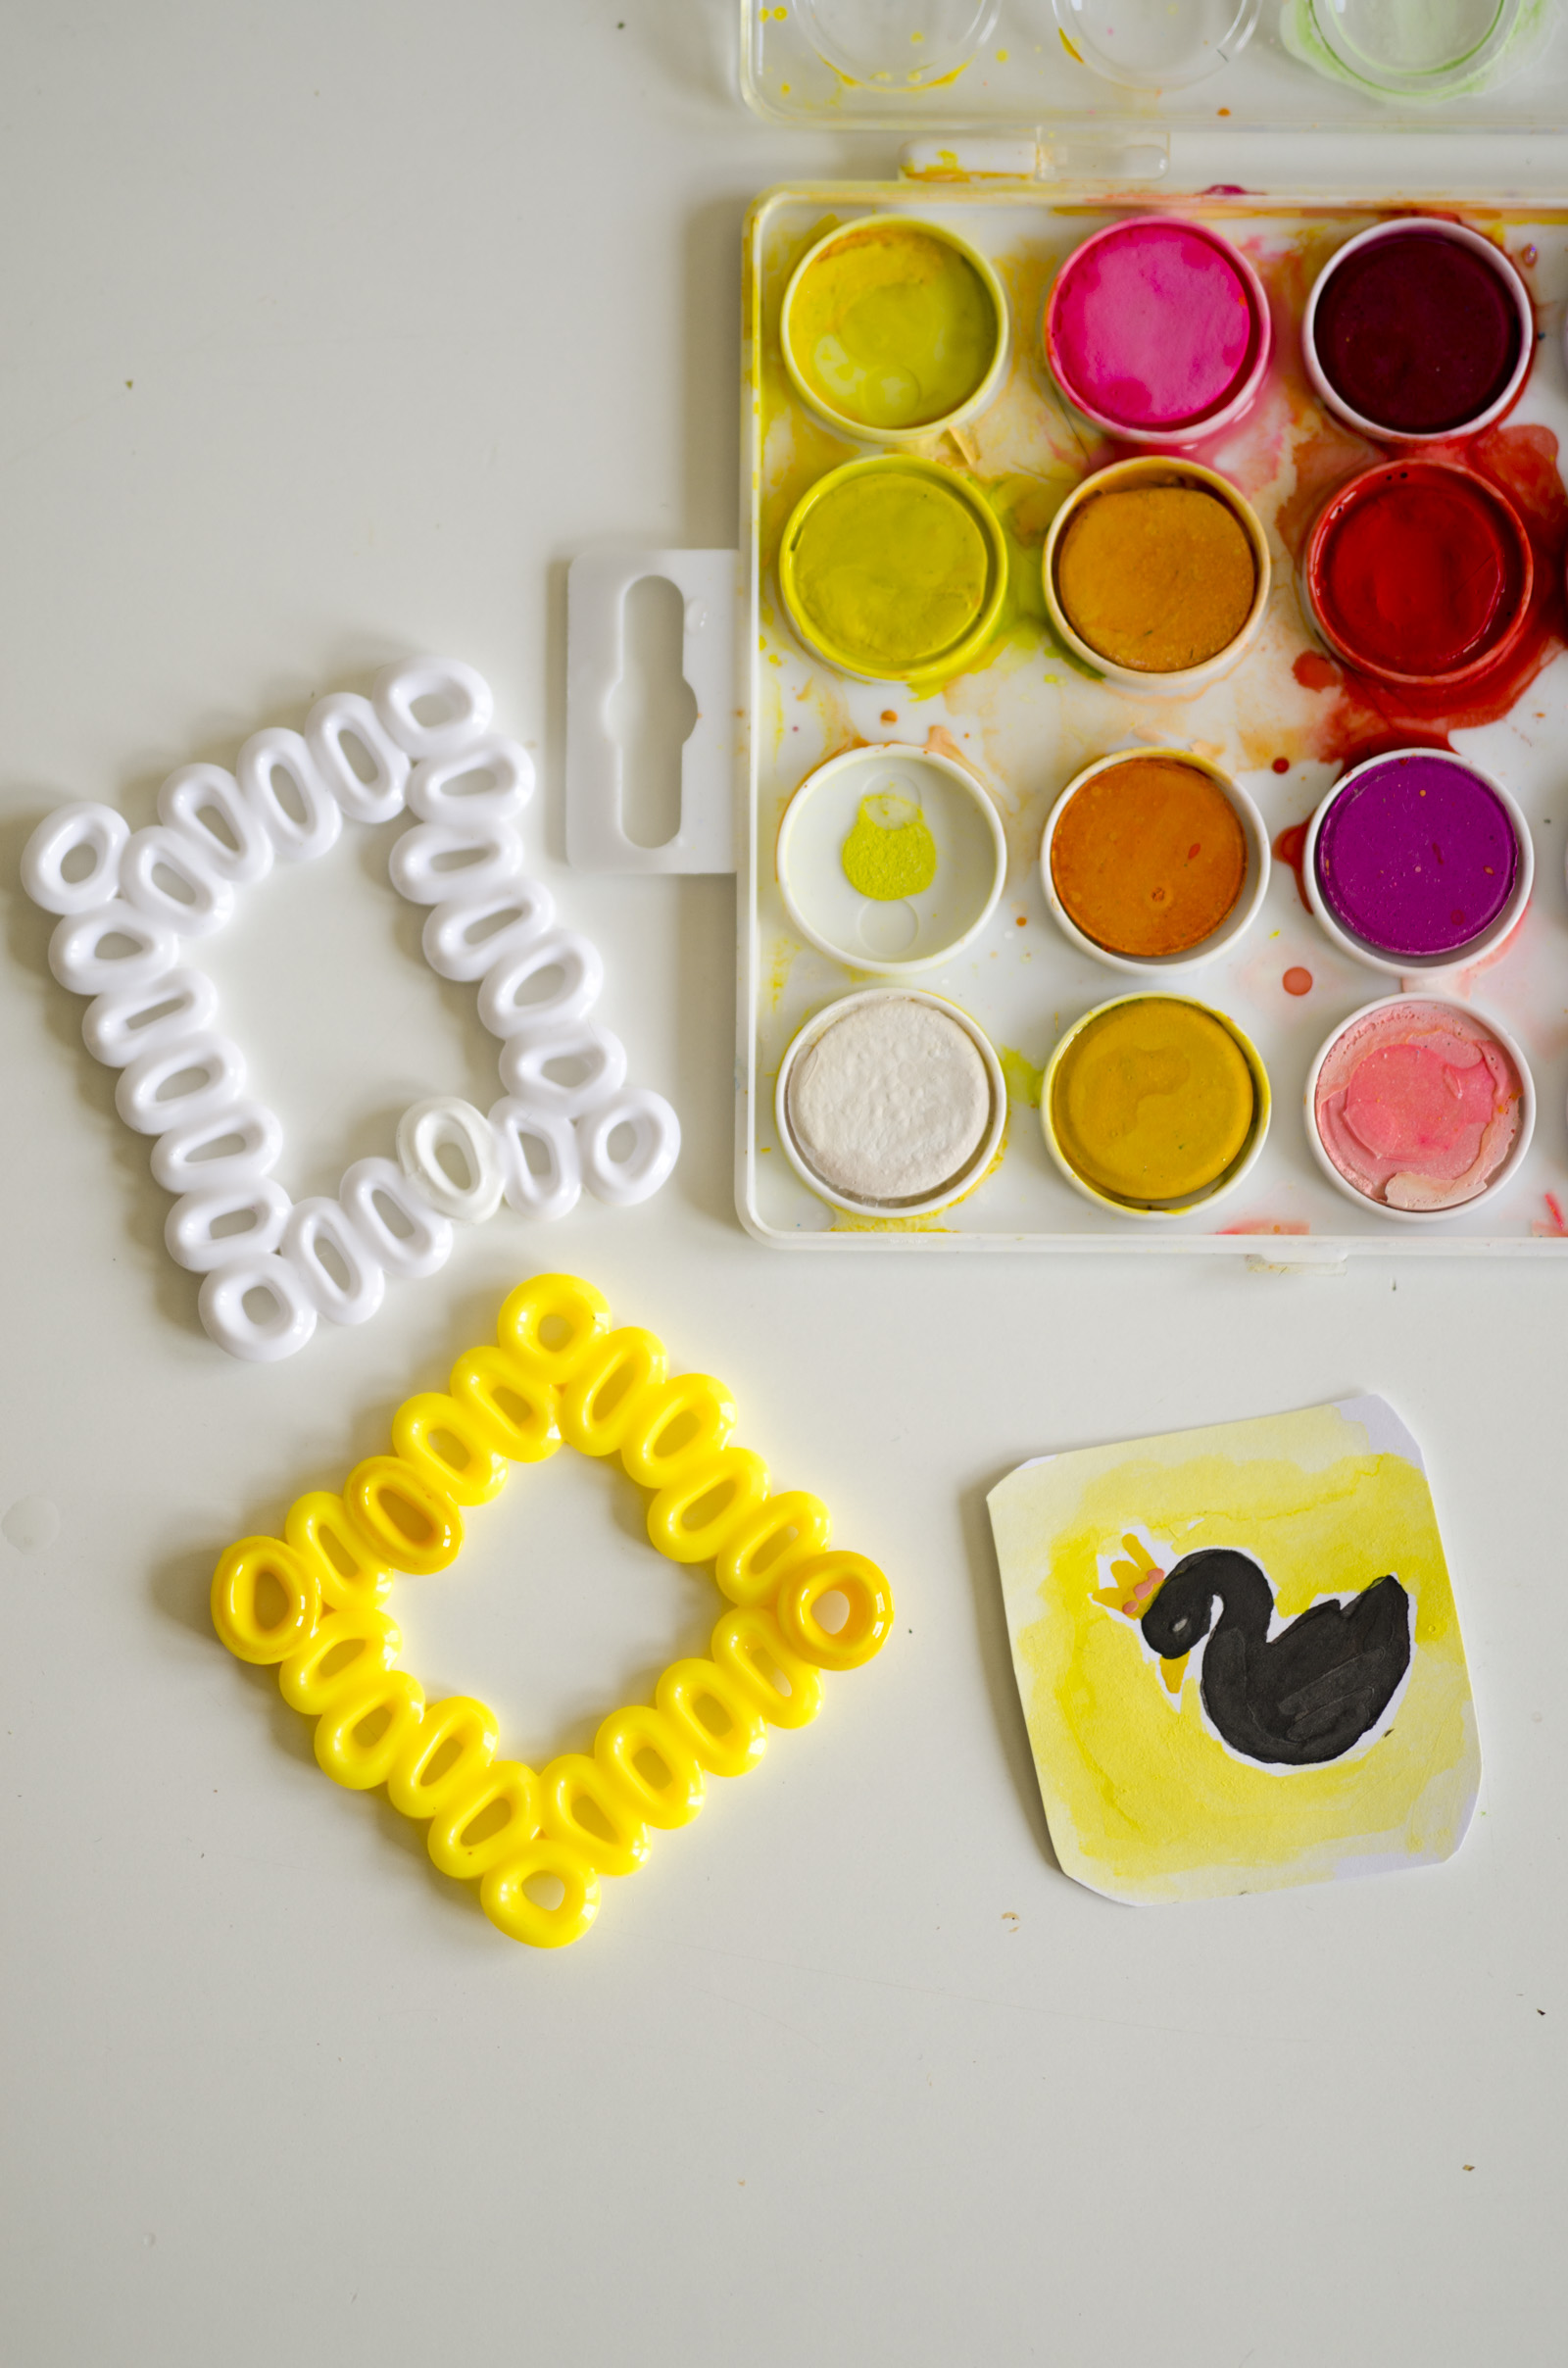
I think you barely need a tutorial but, since we’re using beads unconventionally, by baking rather than ironing, I’ll share a step by step for you to see how we made these. You could iron this, traditionally but, I really like the mod, looped -look, created by the melted beads.
Materials:
- Hamas Beads (We used large but small work, as well)
- Baking Sheet that is protected with baking paper.
- Magnets (Use the round magnets for extra hold or magnetic tape for light hold. If you use the magnetic tape, line the entire frame)
How to make Magnetic Bead Frames.
- Plan the frame shape
- Pre-heat Over to 160 C (320F)
- Place the beads in desired shape; touching one another, on a covered baking sheet.
- Place carefully in oven for approximately 10 minutes.
- Remove from over and cool.
- Once cool, turn over and, using a glue gun, glue the magnets onto the backs of the frames.
- Choose photo or artwork for the frame. Trace the edges and cut to fit the frame. Attach with double sided-tape.
- Enjoy!
- Since these are magnetic, you can use them on a magnetic board, the refrigerator or lockers.


After making the frames, bring on the adventure of creating artwork to fill them or enjoy the search for finding or creating the perfect portraits to fill them!
Magnetic Melted Bead Frames are a super, simple, project to make with a group, with older kids and with both boys and girls. If you use this tutorial, I’d love to see what you do, too! Share them on Instagram , Facebook , Pinterest . Use the #willowdayproject tag for others to enjoy your work, as well!
 PS: Several years ago, I saw a Swedish book with a mother and daughter who had made traditional Hama Bead Frames and had always planned to make these on a rainy day project. The book was one I flipped through and wish I could remember it’s name. If you’re familiar with the book, I’d love to share that book name!

