Happy Monday!

Hi. I hope your week is off to a great start! Monday, for us, means: back-to-school and I love to send the kids off with personalized supplies. Make a DIY: Card Pen Cases with cards the kids collect. These aren’t just for school; there are schools of ideas for ways to use these cases: make them in different sizes for toys, marbles, toiletries; use as a place to house card collections and more. I’d love to see what you do with this tutorial.
Happy, happy, DIY: Card Pen Case making!


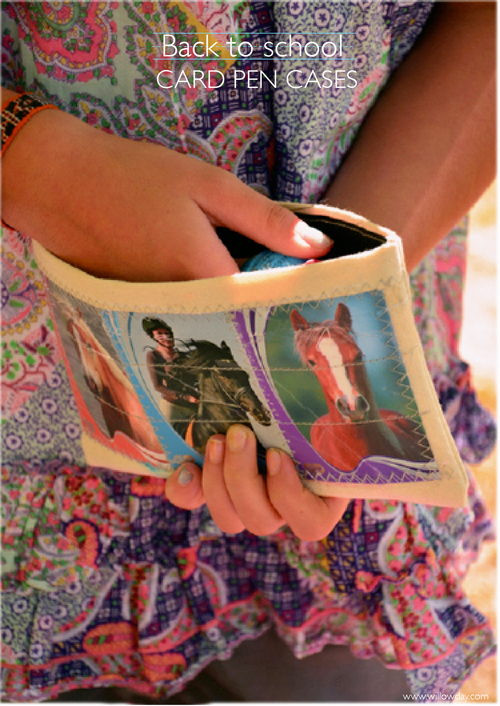
To get started, the kids choose some of their favorite collectible cards —- horses, baseball and soccer —- any collectible cards works and then, these cards were sewn into pen cases. I love up-cycling extra cards into something functional. They serve as time capsule of your children’s interests — and are such a fun personal project to prepare together. Follow along below with the full step-by-step tutorial below. Let’s start making!
(Click on READ BELOW for photos and tutorial)
DIY: Card Pen Cases TUTORIAL:
 DIY: Card Pen Cases Supplies:
- Fabric, I used denim and heavy linen here
- Fabric Scissors
- Adhesive Book Protector Plastic
- Pattern:
TO make the Baseball Pen Case, as shown (12 x 11″)
- Cut a rectangle from paper
To make the Horse Pen Case (12 x 10) - Cut a rectangle from paper
BOTH: - Choose 12 Collector Cards
- Baseball format: 12 (makes 2 cases/cut two pieces of fabric)
- Horse format: 3
- Choose between a Zipper or Velcro:
- Zipper, I used 12 inch zipper for the Baseball Pen Case
- Velcro, for the Horse Case, which will be cut to size for the opening Non-acidic Tape


- Organize your cards in a pattern, then, turn them upside down (back sides up), edges tightly together and tape into place.
- Make any pattern, these don’t have to be perfectly squared but do have to have the edges tight against one another.

- Carefully turn these taped cards over and very, smoothly lay the layer of the book covering plastic to cover all of the cards.

- Using a sewing machine set to “zig-zag,” sew along the edges catching the edges of two side-by-side cards to bind them.
- If you would like to sew other stitches — diagonal, straight, tracings or patterns, in over these cards, this gives more reinforcement and adds and interesting effect; this is optional. Once all of the edges of the cards have been bond and the sewing is finished.
- Clip loose threads. You can choose to cover both sides of the pen cases with the cards or just one. In this tutorial, we are covering only one side.

- Cut this sewn card piece in 1/2 to fit it to one half of the pen case.
- Pin in place. Remember to look at how the pen case will fold. You want to make sure that these are right side up.

- Using a sewing machine set to “zig-zag,” sew the card piece directly onto the fabric, sewing along the edges and again, it is optional, but you may also sew in any extra details, is desired.
![dm-aug-big-tutorial-i]()
- Lay the piece flat, right side facing up.
- Fold along the long, bottom edge of the cards so that the right sides are facing in; wrong side will be out.
- Pin side seams and sew up the two side seams.


- Sew in zipper or Velcro along the open edge.

- Turn inside out, press corners, clip stray threads, and your unique Card Pen Case is ready to go! Happy Willowday!
- Something you might like:
- DIY: Pen Case from Re-cycled Jeans
- DIY: Card ID Tags