Glitter Magic!
![march26firstegg]()
![march26firsteggc]()
These ornaments are gracing corners of our house, bringing charm and are being packed up for gift giving later this week. We’ve had so much fun, but I do feel like I’m sprinting in a “craft-ath-alon.” There’s so much to share! Are you creating, too? I’d love to hear from you. What are you up to?
If there’s ever a season for high color in Sweden, it’s now. Our
Swedish Feather Bouquetshave become more colorful than ever.
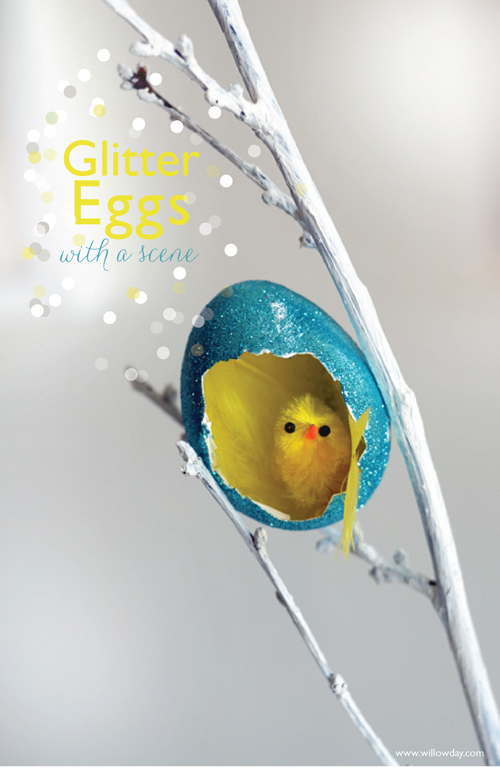
Years ago, my Godmother, Aunt Gail, gave me an Egg Ornament with a scene in it. It transported me and I still have it. Every year I get it out, I can see that they kids are equally mesmerized by it. With friends celebrating both Easter and Passover this week, I wanted to share this egg project.
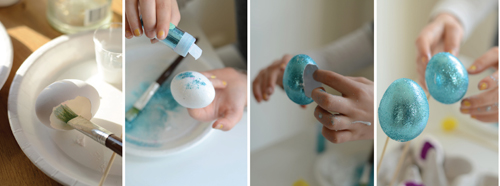
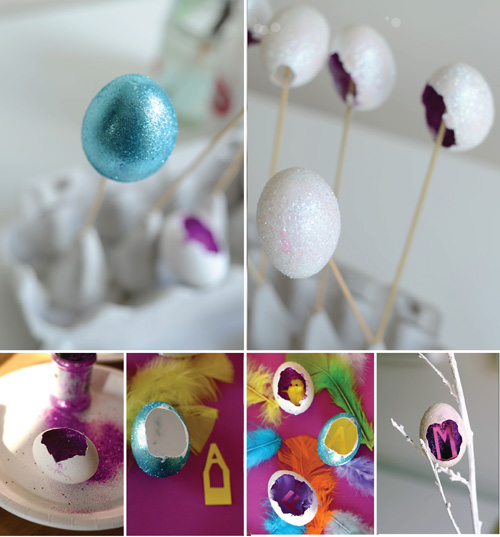
I’ll share this simple project, but, you can make these as detailed as you like. We skipped the process of coloring our eggs and glittered them, instead. Once the glitter dried, we returned and made scenes inside them. The kids filled theirs with feathers and fuzzy chicks and I helped them make others which had monograms. I thought we’d
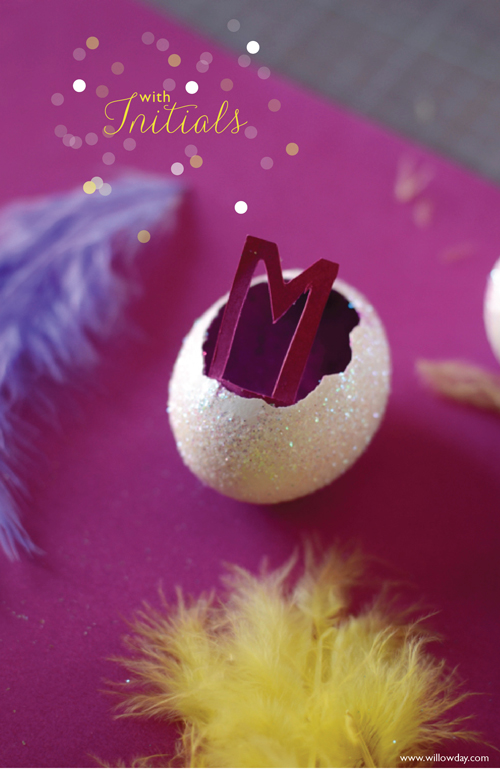
wrap up our Monogrammed Eggs to give away as great hostess gifts, teacher presents or to use as place cards. Choose your own colors and fill these with scenes that fit your fancy. We hope these spread a little glitter magic around you, too!
GLITTER EGGS WITH SCENE TUTORIAL
![march26newtutf]()
Before starting:
Hollow, rinse and eggs. With a pin, press a small hole on the top of the egg to string with a ribbon for hanging and also prick a circular pattern in the area where you will create the hole for the scene. After pressing the small holes, carefully press this area out. If an edge breaks, just even it out. Let dry completely.
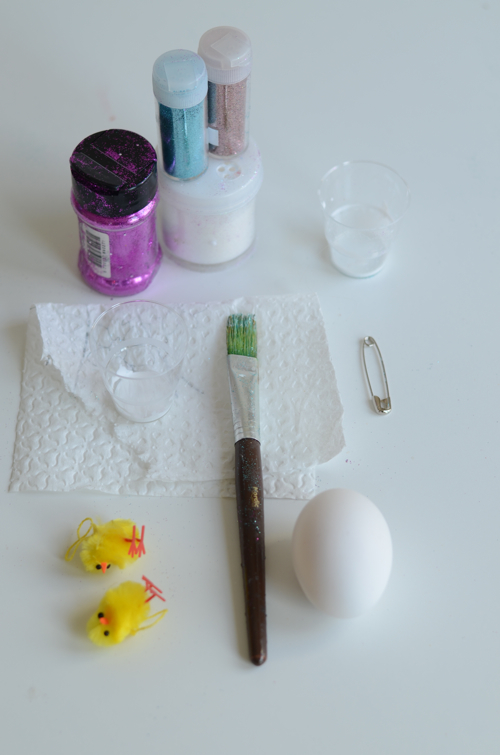
SUPPLIES:
– Hollowed Eggs with hole for scene and ribbon
– Glitter
– Bowl of water
– Hobby Glue
– Paint Brush
– Fuzzy Chicks
– Card Stock
– Xacto Knife
– Scissors
– Strong Glue or Glue Gun
– Drying Rack: I used an egg contained with wooden skewers (see center images below)
– Pin
– Paper plate with sides, to be used as a work surface
– Small cup for mixing glue and water for painting.
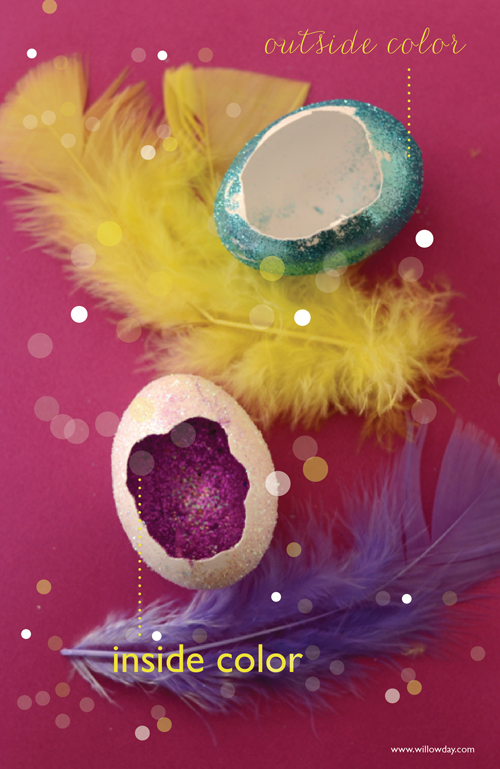
Prepare work area. In a small cup, thin the glue. Once the glue is quite thin and has a regular consistency, paint the interior or the exterior of the egg. Shake the glitter, evenly, over the interior or exterior of the egg. Let dry. To dry, we rested ours on wooden skewers, as you can see below. Once this first layer of glitter has dried, to the reverse side. Let dry completely.
Thread the ribbon into the hole at the top of the egg and tie. Glue the feet of the chick and press gently but, firmly on the bottom of the egg, close to the front of the egg. Once dry, carefully add a little more glue with the brush inside the eggs and fill it with feathers. For the Monogram, I cut a long rectangle that was thinner than the hole in the egg, but twice as long as the monogram. Cut the initial in the top 1/2 of the paper, then fold down the bottom; apply glue to this foot and place on the bottom of the egg.
Let dry. Once dry these are ready for use! Enjoy!
Something you might like:


 Get all willowday posts directly to your in box and receive a FUN, FREE, KIDS ebook COOKBOOK | HERE
